Showing posts with label Ilford. Show all posts

5.9.21

TRICHROMES - COLOUR PHOTOS WITH ILFORD HP5


A SCENE THAT SCREAMS COLOUR

Have you ever been out with your camera, loaded with your favourite black and white film stock and found a scene that screams to be shot it colour? Of course you have, we have all been there!

Today I am going to introduce you to a new 150 year old process called Trichromy also known as the three colour process or more recently Trichromes (by Jasper Fforde). As with all early photographic techniques it's difficult to say who coined the process first as there were many people working on similar techniques in the same space of time.

HISTORY
The big three that are most commonly referenced are Louis Arther Ducos du Hauron, Charles Cros and James Clerk Maxwell. Both Ducos du Hauron and Cros presented their methods to the French Society of Photography on the 7th of May 1869 despite not working with one another or knowing of each other's research. J.C Maxwell presented the first colour photograph at a Royal institution lecture on colour theory in 1861. The photograph was taken by Thomas Sutton the inventor of the SLR, of a tartan ribbon using red, green, blue and yellow filters. Unfortunately for Maxwell the wet collodion plates Sutton used were insensitive to red and barely sensitive to green light. A published remark on the lecture read “if the red and green images had been as fully photographed as the blue" it would have been a fully coloured image.

THE PROCESS
I have used a red, green and blue filter and some digital manipulation to create this effect.

The list of items you will need to create this effect, include:
A roll of film (any speed, orthochromatic film will not work as it is not sensitive to red light.)
A camera
A tripod
A light meter (or digital camera for meter reading)
Red, green and blue colour filters (sweet wrappers can and have been used)
Editing software

The key to this procedure is to take three identical images using all three of the filters.

COMPOSING THE IMAGE
My workflow follows these steps.

In my personal opinion I think that outdoor photographs are more interesting than indoor studio shots. I like to look for partially cloudy skies and foliage blowing in the wind, anything with movement. Slight movements of subjects create a Harris shutter type effect to the image.

METERING
Meter the scene, I recommend only taking a reading of a neutral colour object in the scene such as concrete, my reasoning for this is because it will not be affected by the colour filter. Subjects to avoid metering would be anything red, green or blue in colour. I can then apply my colour filter compensation in my case 3 stops for the red filter 2 for the green and 3 stops for the blue filter. Before taking my images I would double check my reading with all filters to make sure that all my readings are accurate. If any of the exposures are off you may end up with weird colour shifts much like the one below. These can be corrected in the editing process but take time.
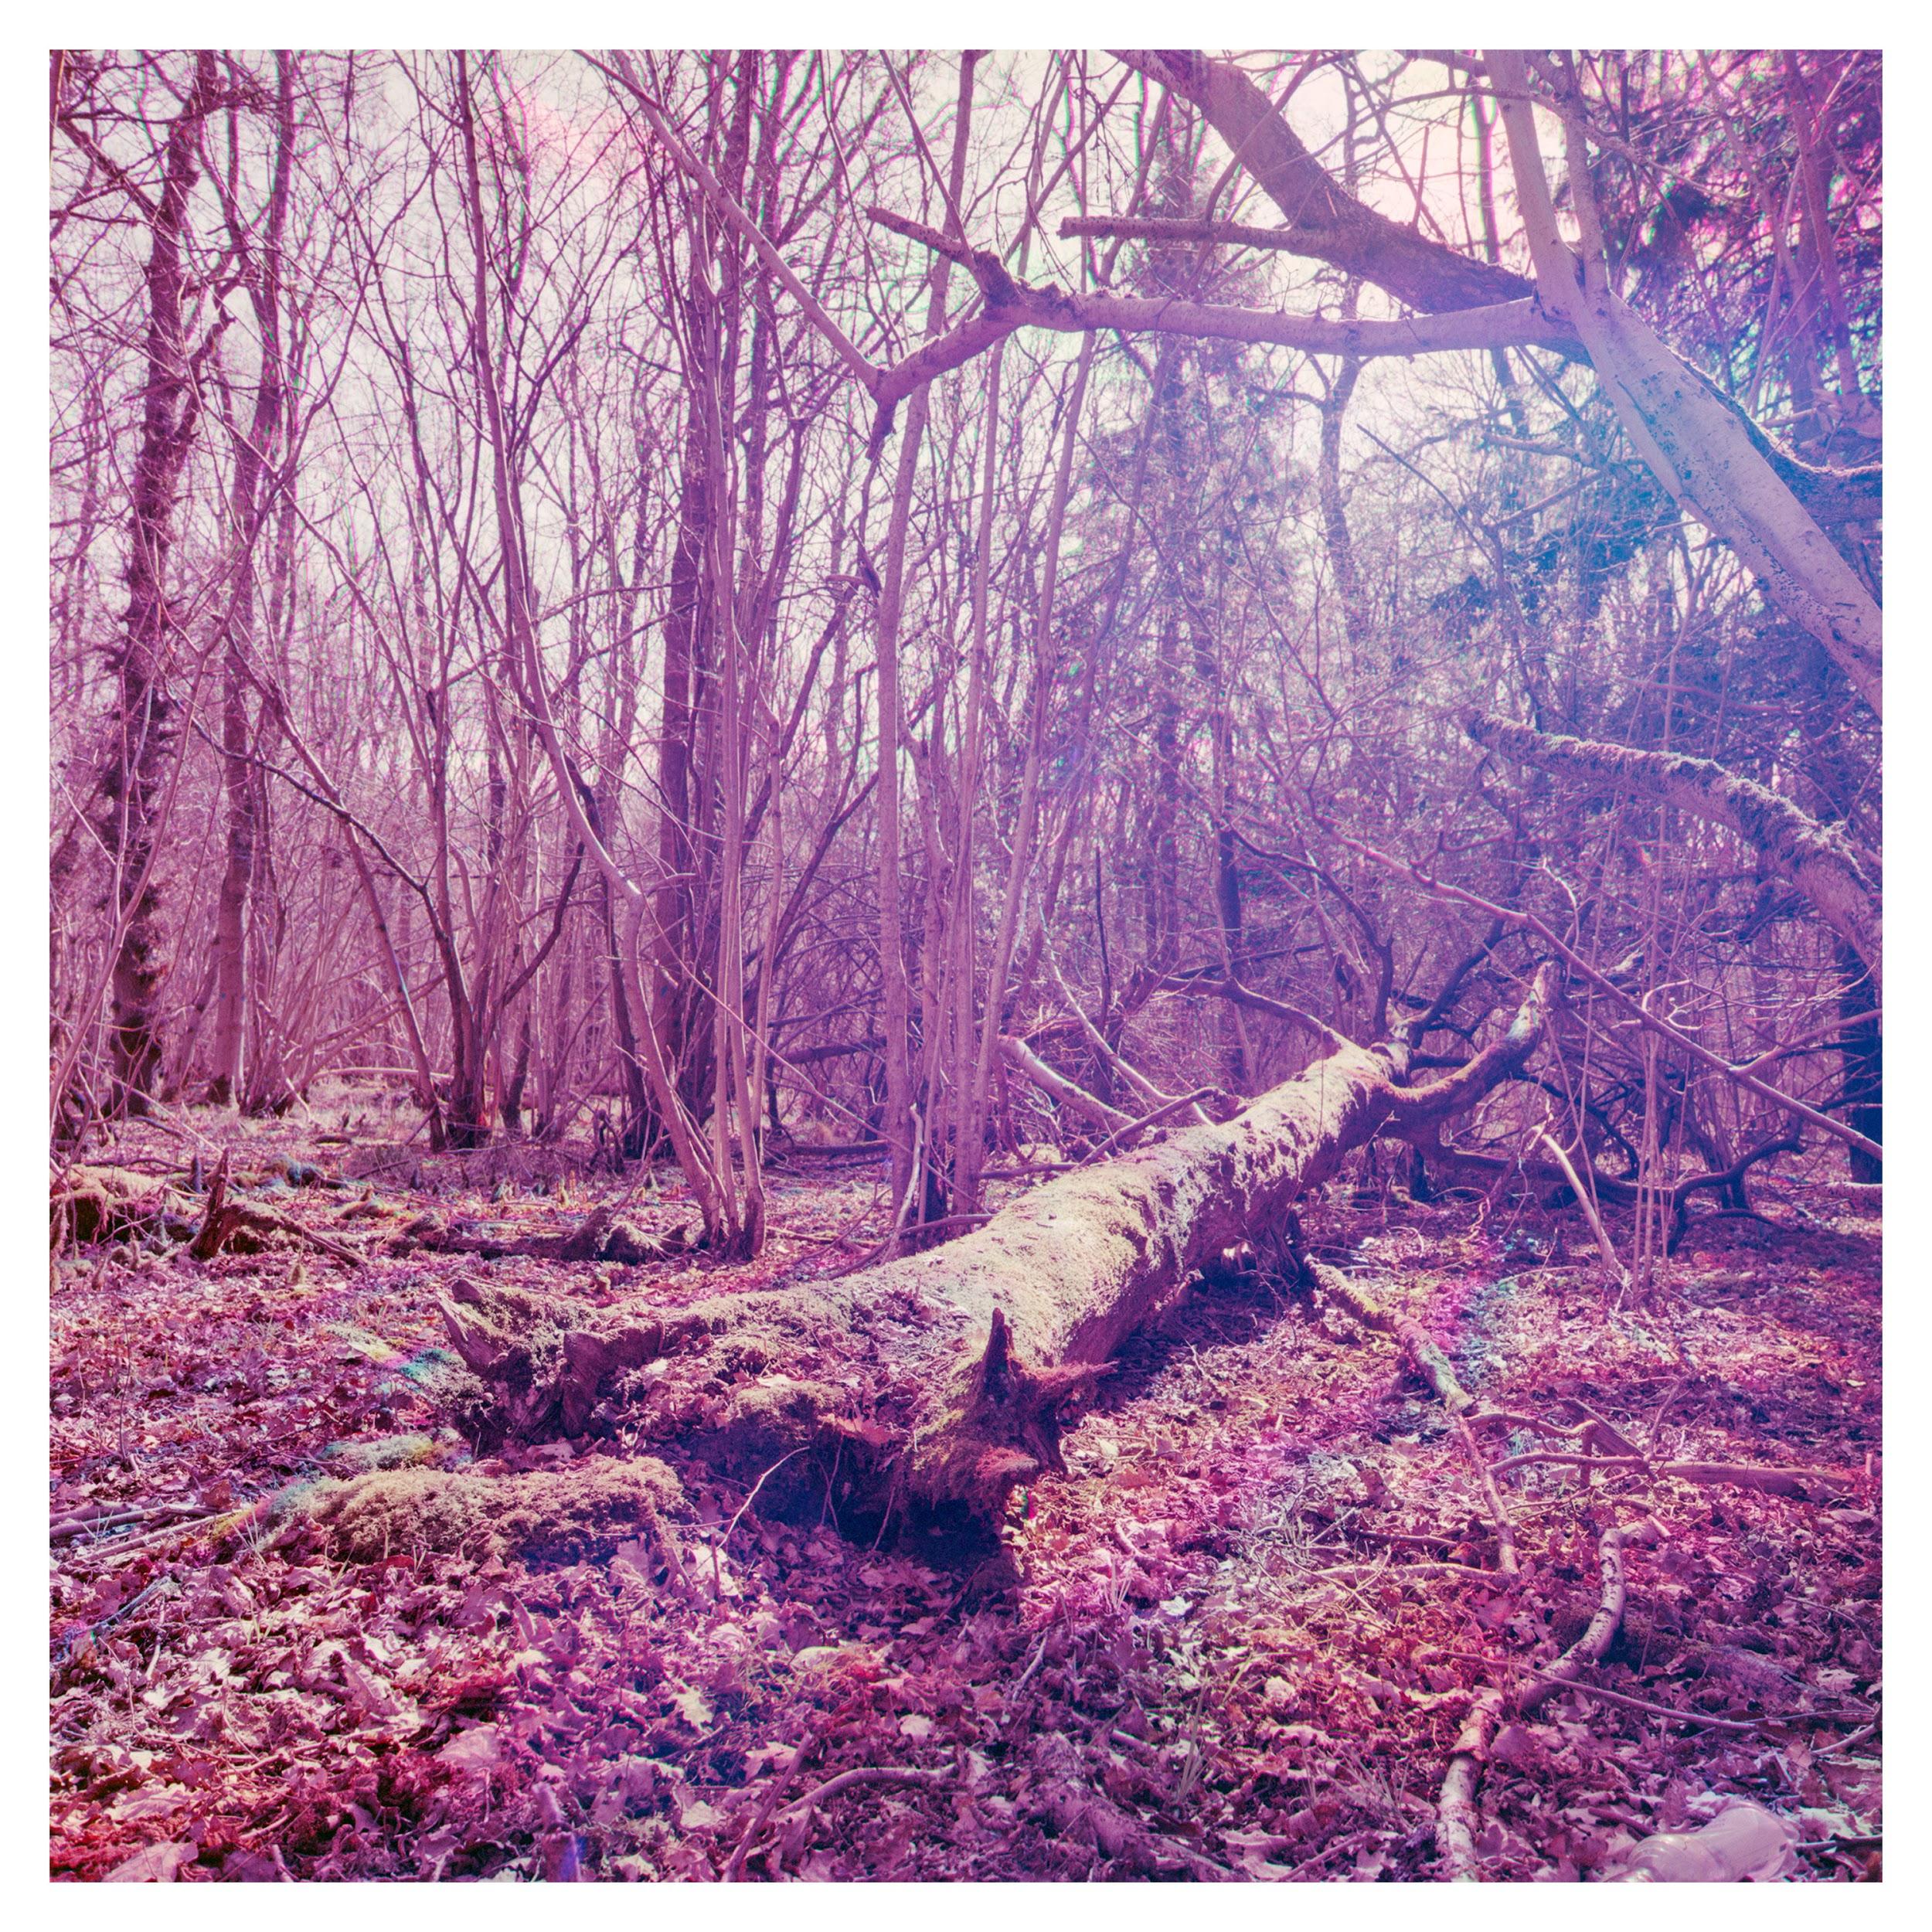
Incorrect exposure on all filters Very Lomography Purple

It is important to remember which filter you used on each frame number. The order in which I take my images are RGB only because of the abbreviation of RGB in camera sensors televisions and online image publishing.

SCANNING AND MANIPULATING THE IMAGES.
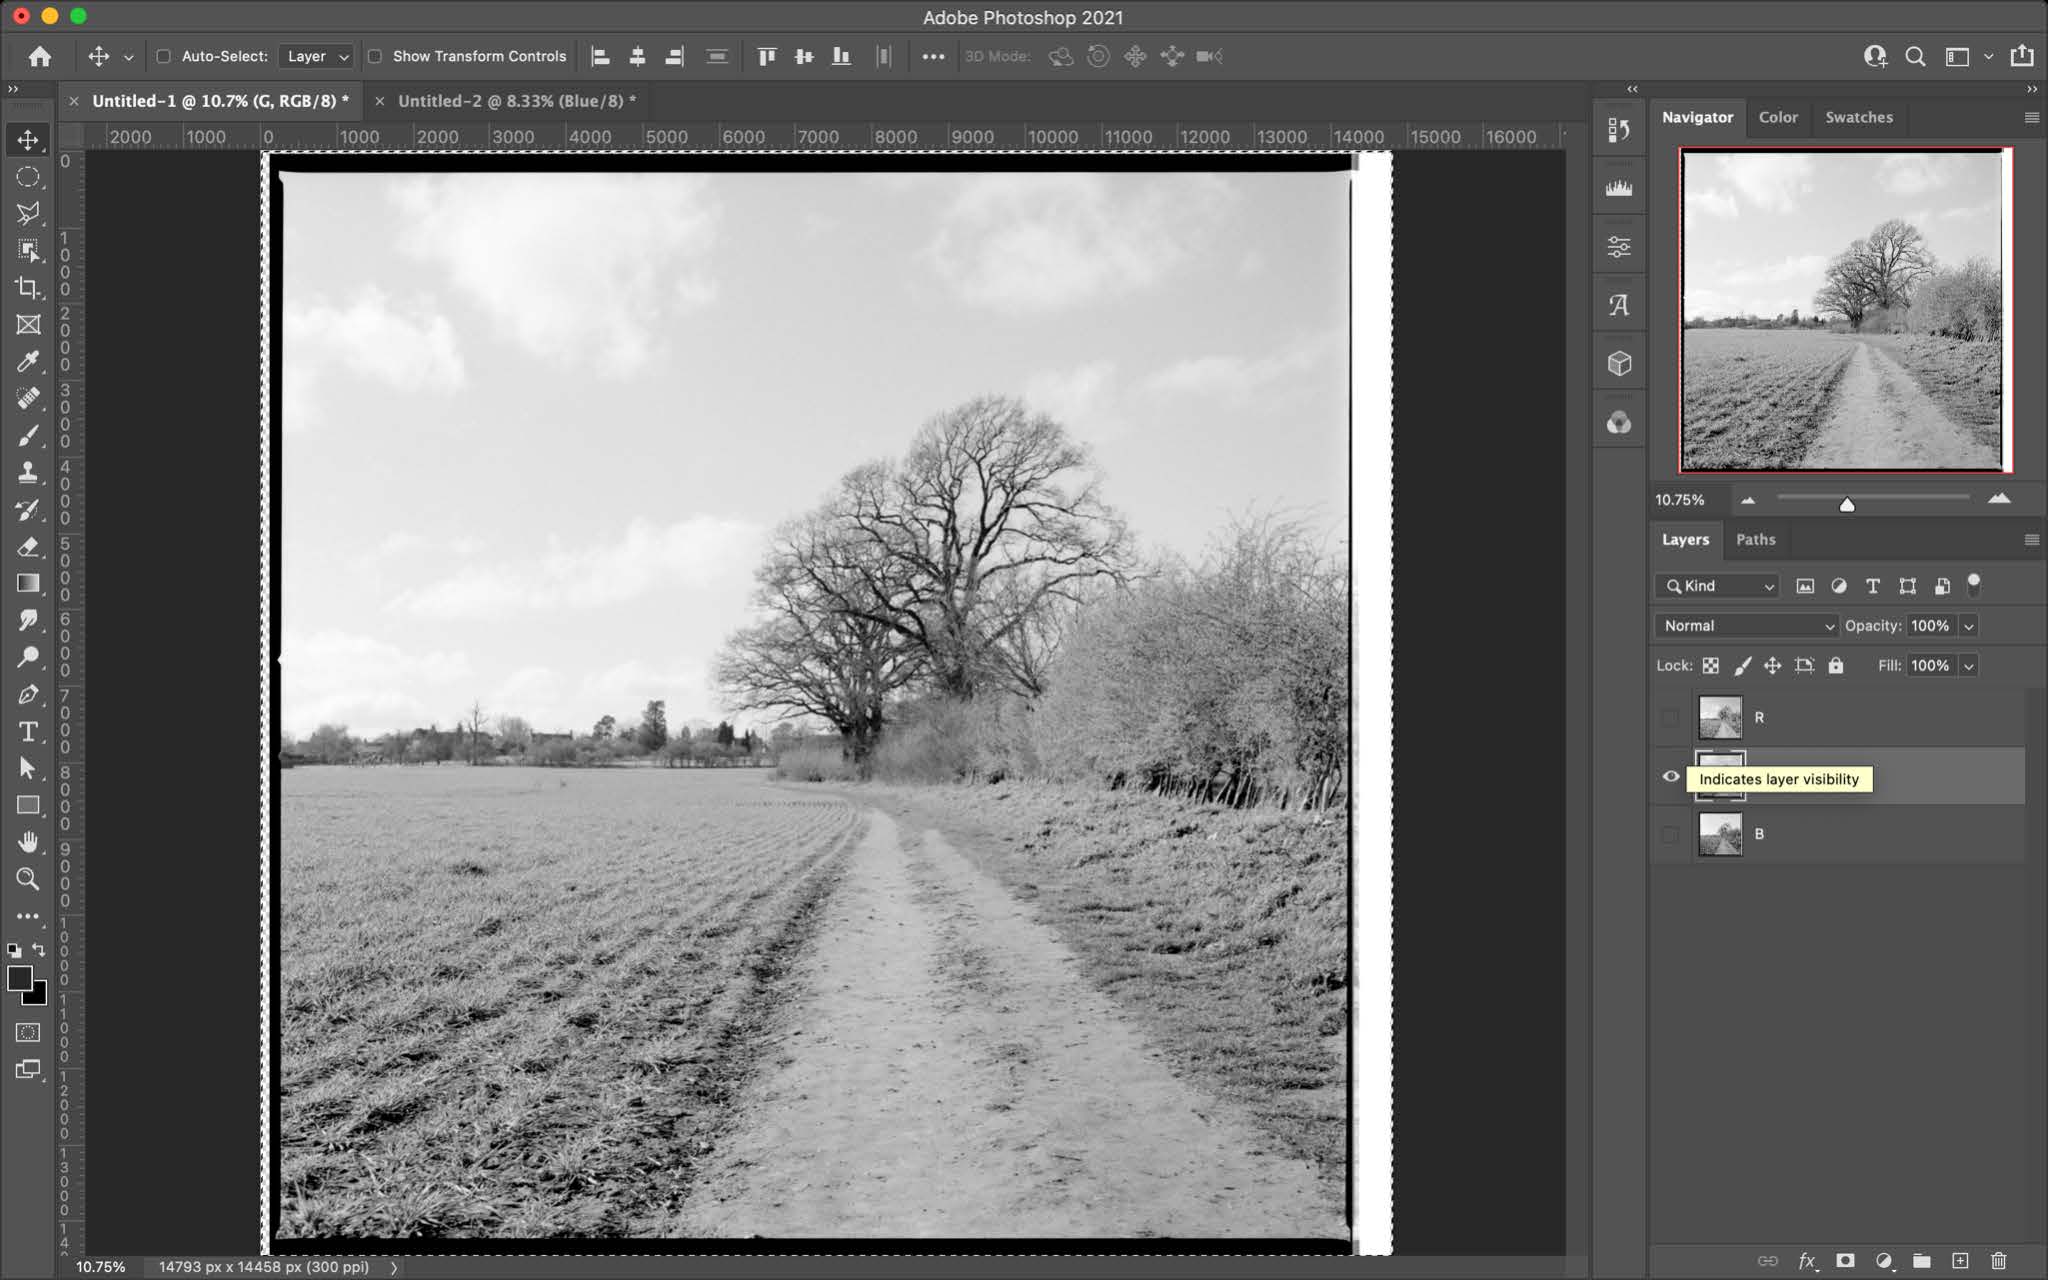
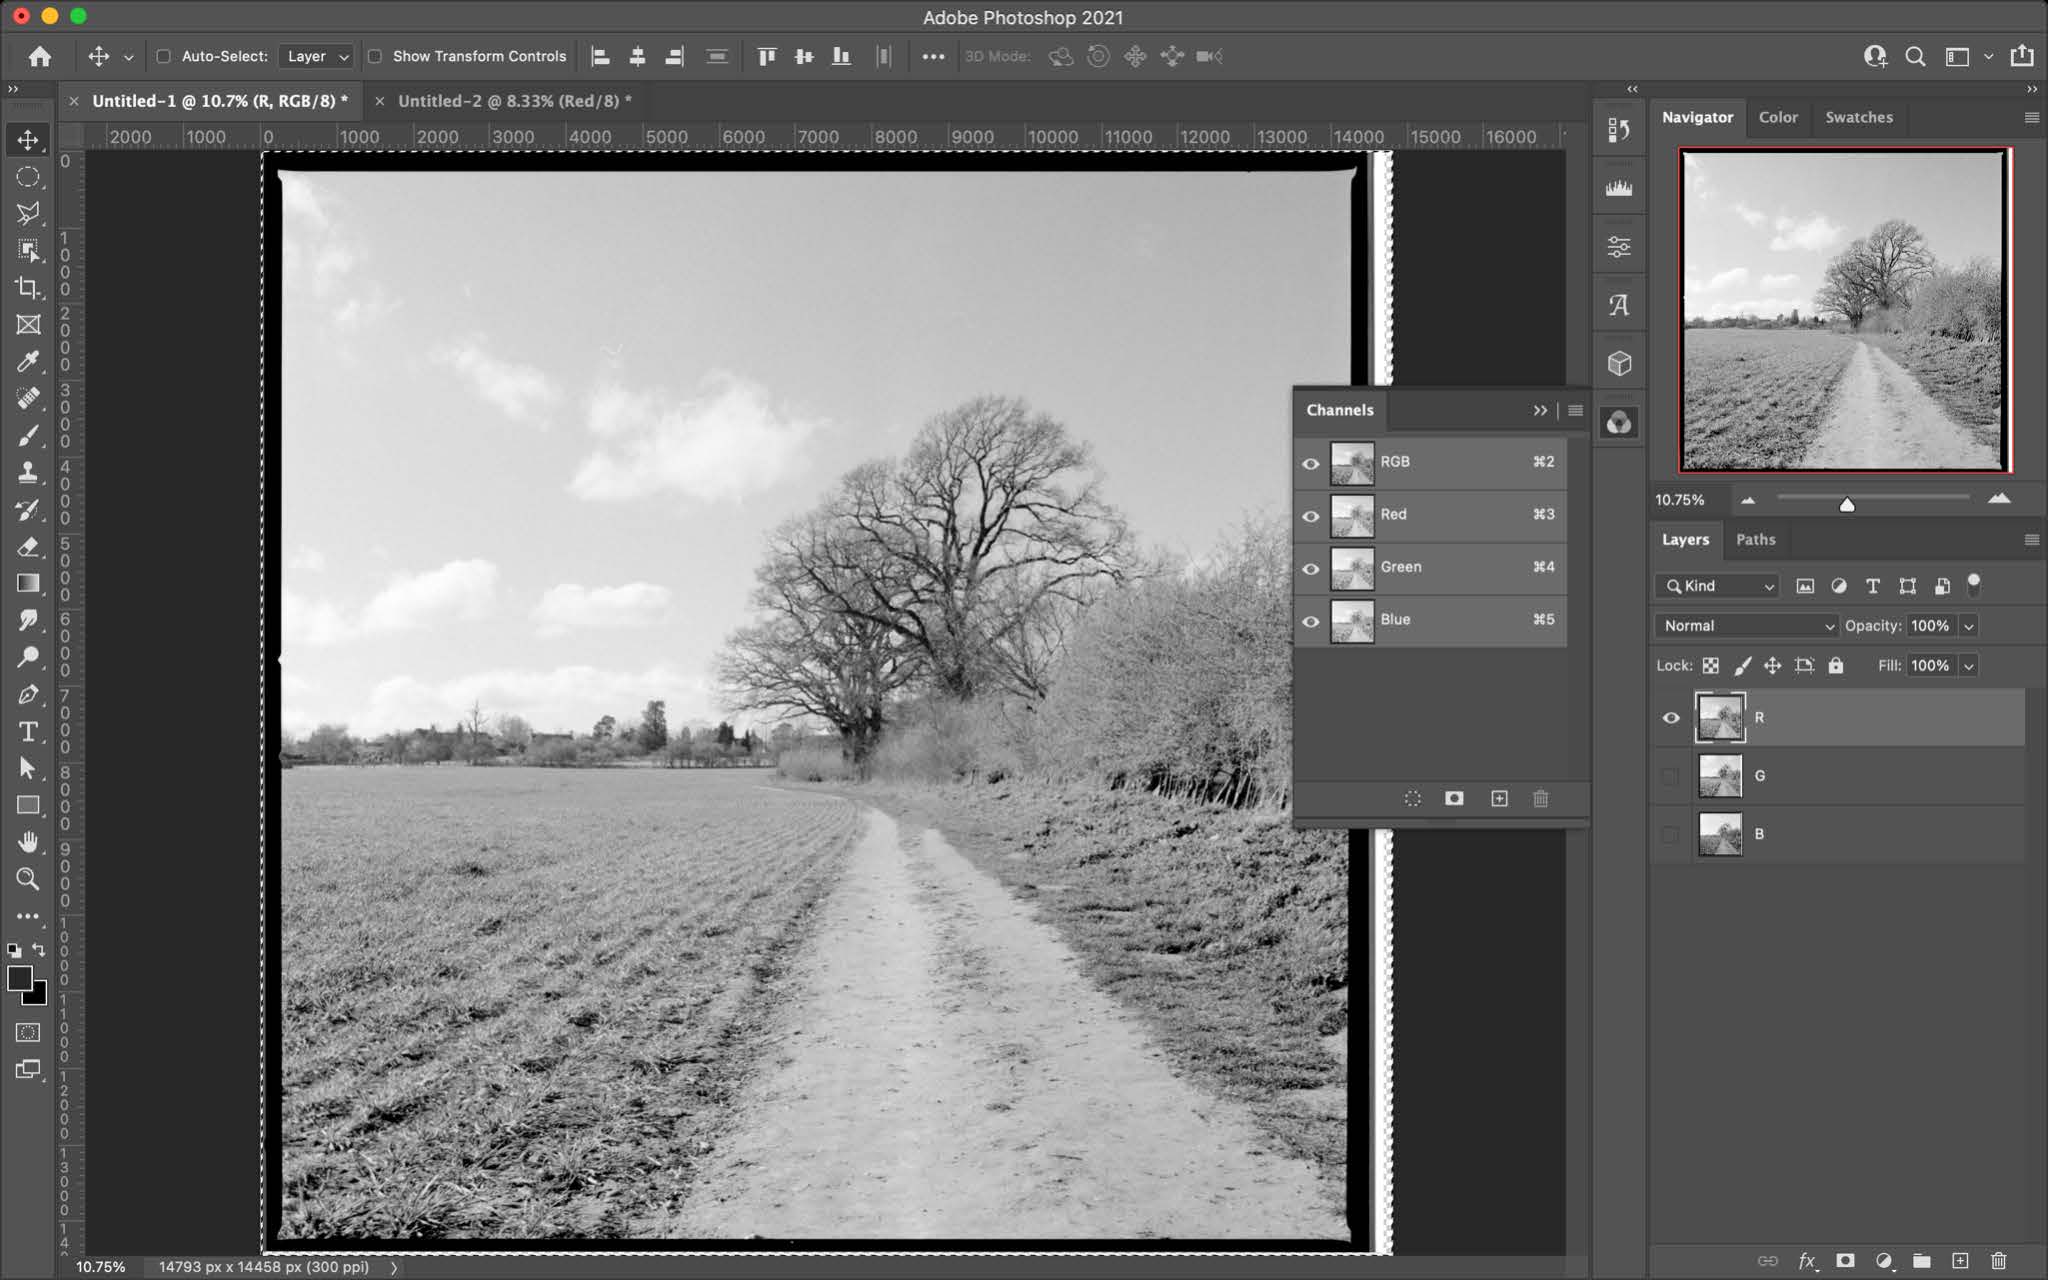
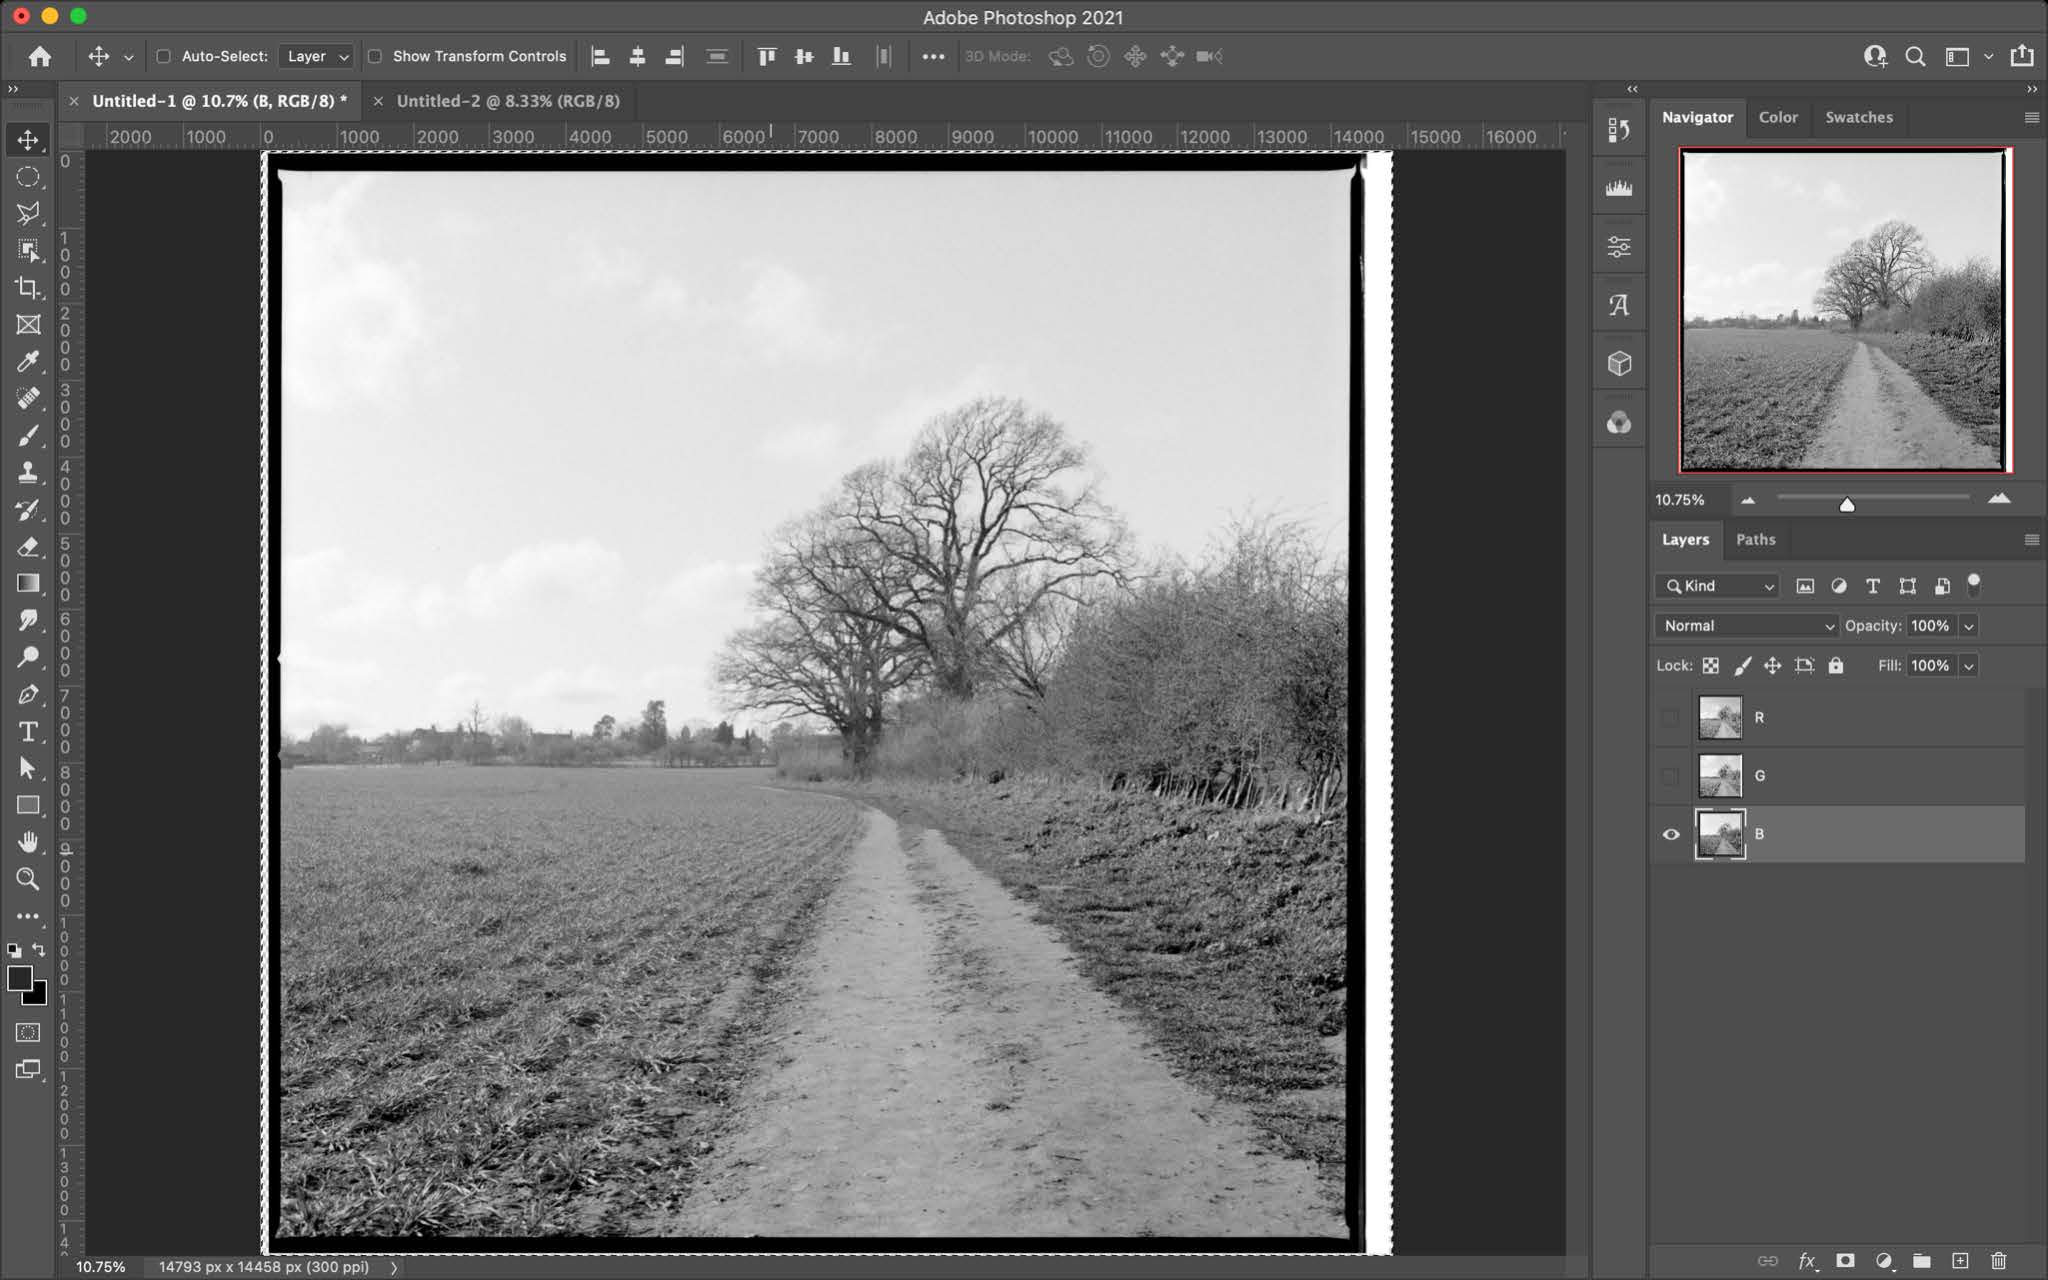
You can develop your negatives as normal, in my case I used ID-11. Once developed and scanned you can bring them into photoshop and combine all to the images. Once all three images are open in photoshop navigate to File>Scripts> Load Files into Stack… From here click add open files and check the box “Attempt to Automatically Align Source Images. Failure to do so will result in a more extreme Harris shutter effect on the final image. Depending on the size of your files this may take a minute or two. Once they are fully loaded you can rename each layer red green and blue. I order my layers red on top green in the middle and blue on the bottom.

From here there are two methods of combining the images.

METHOD 1
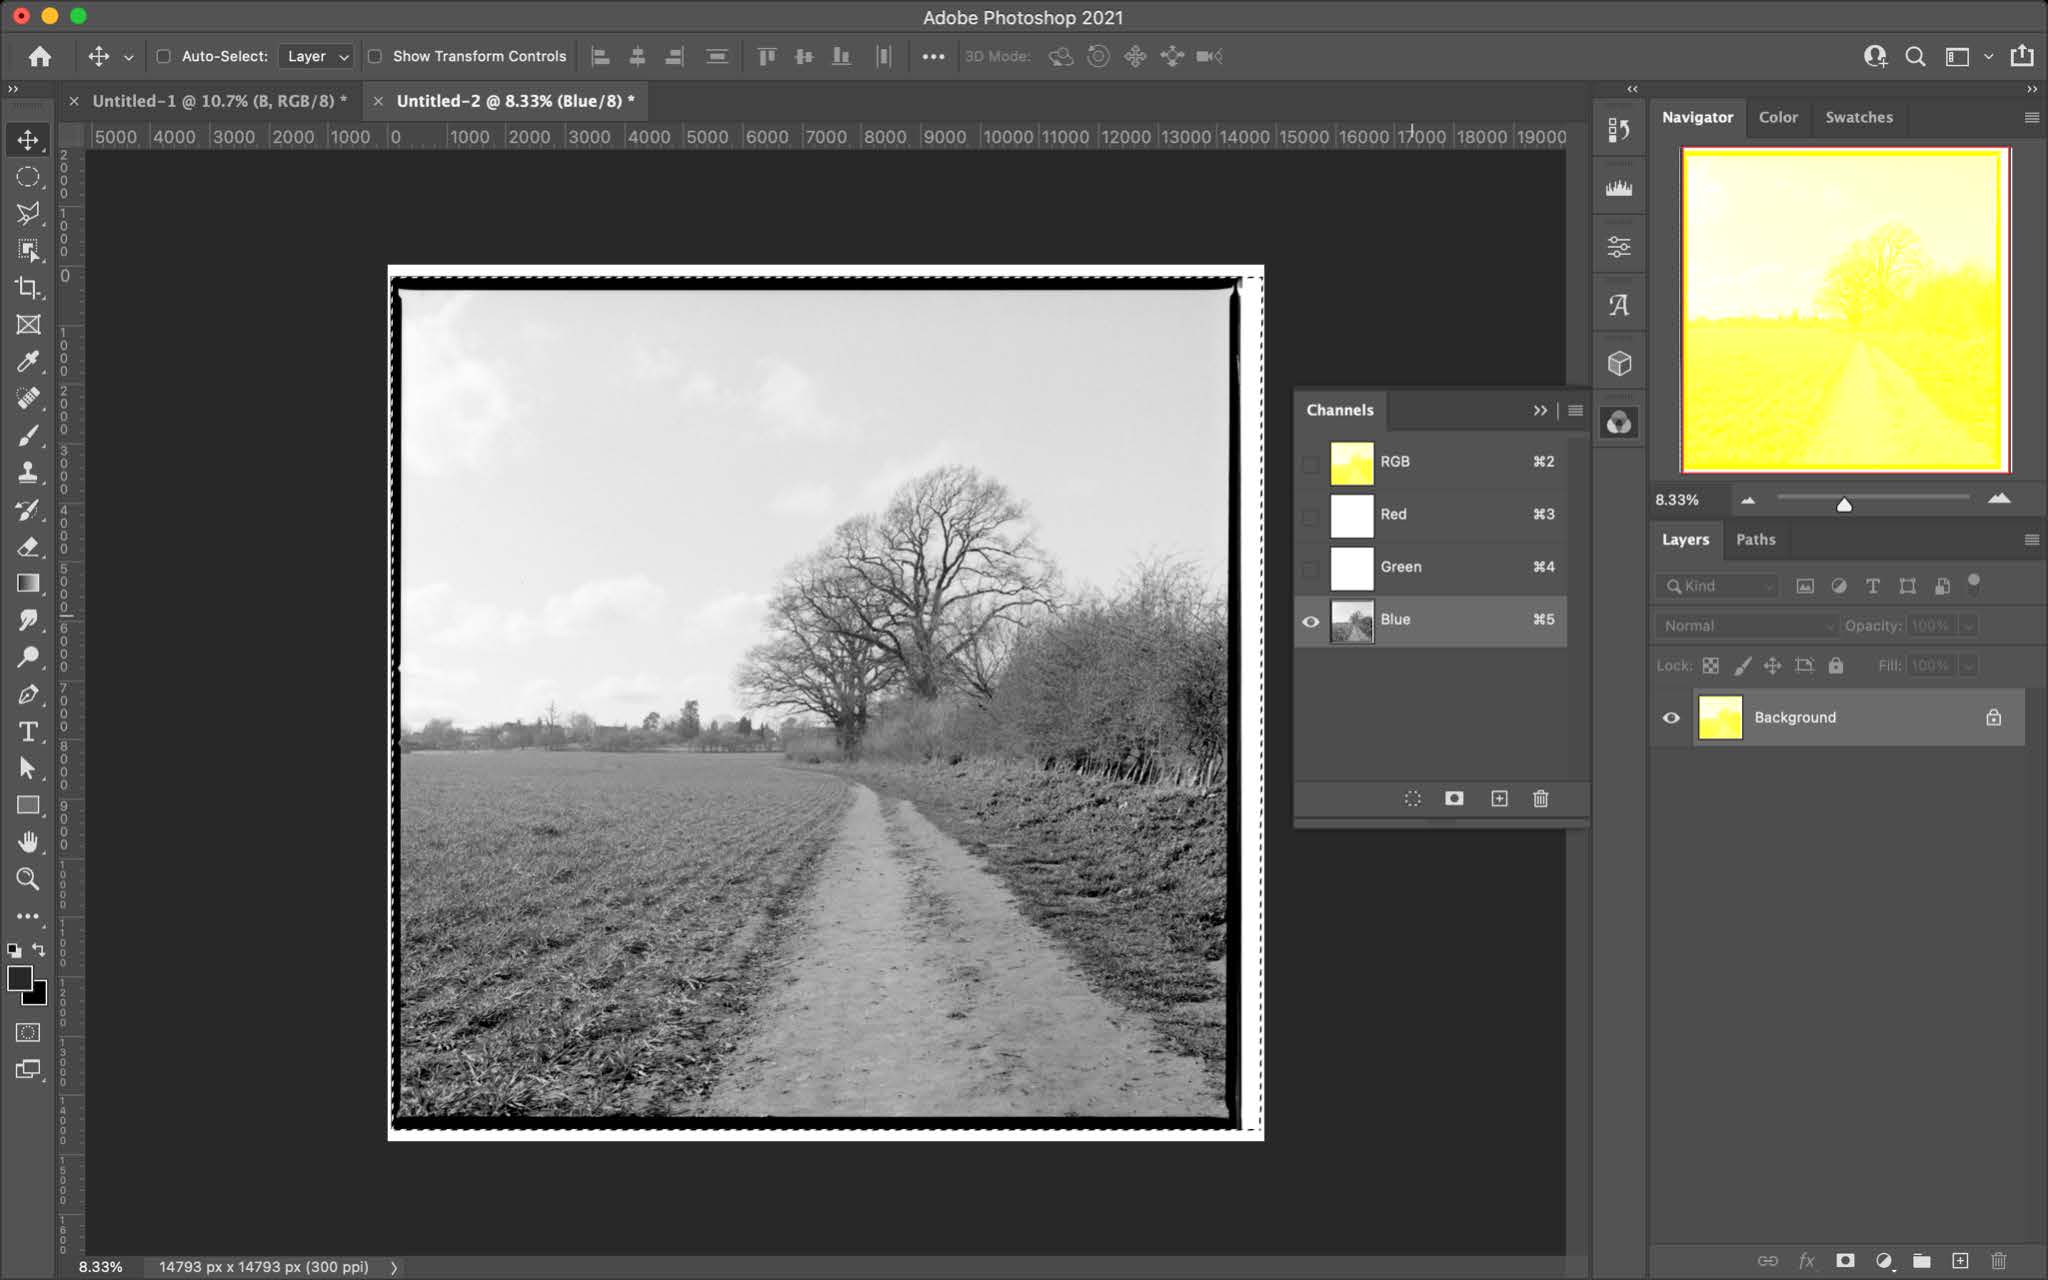
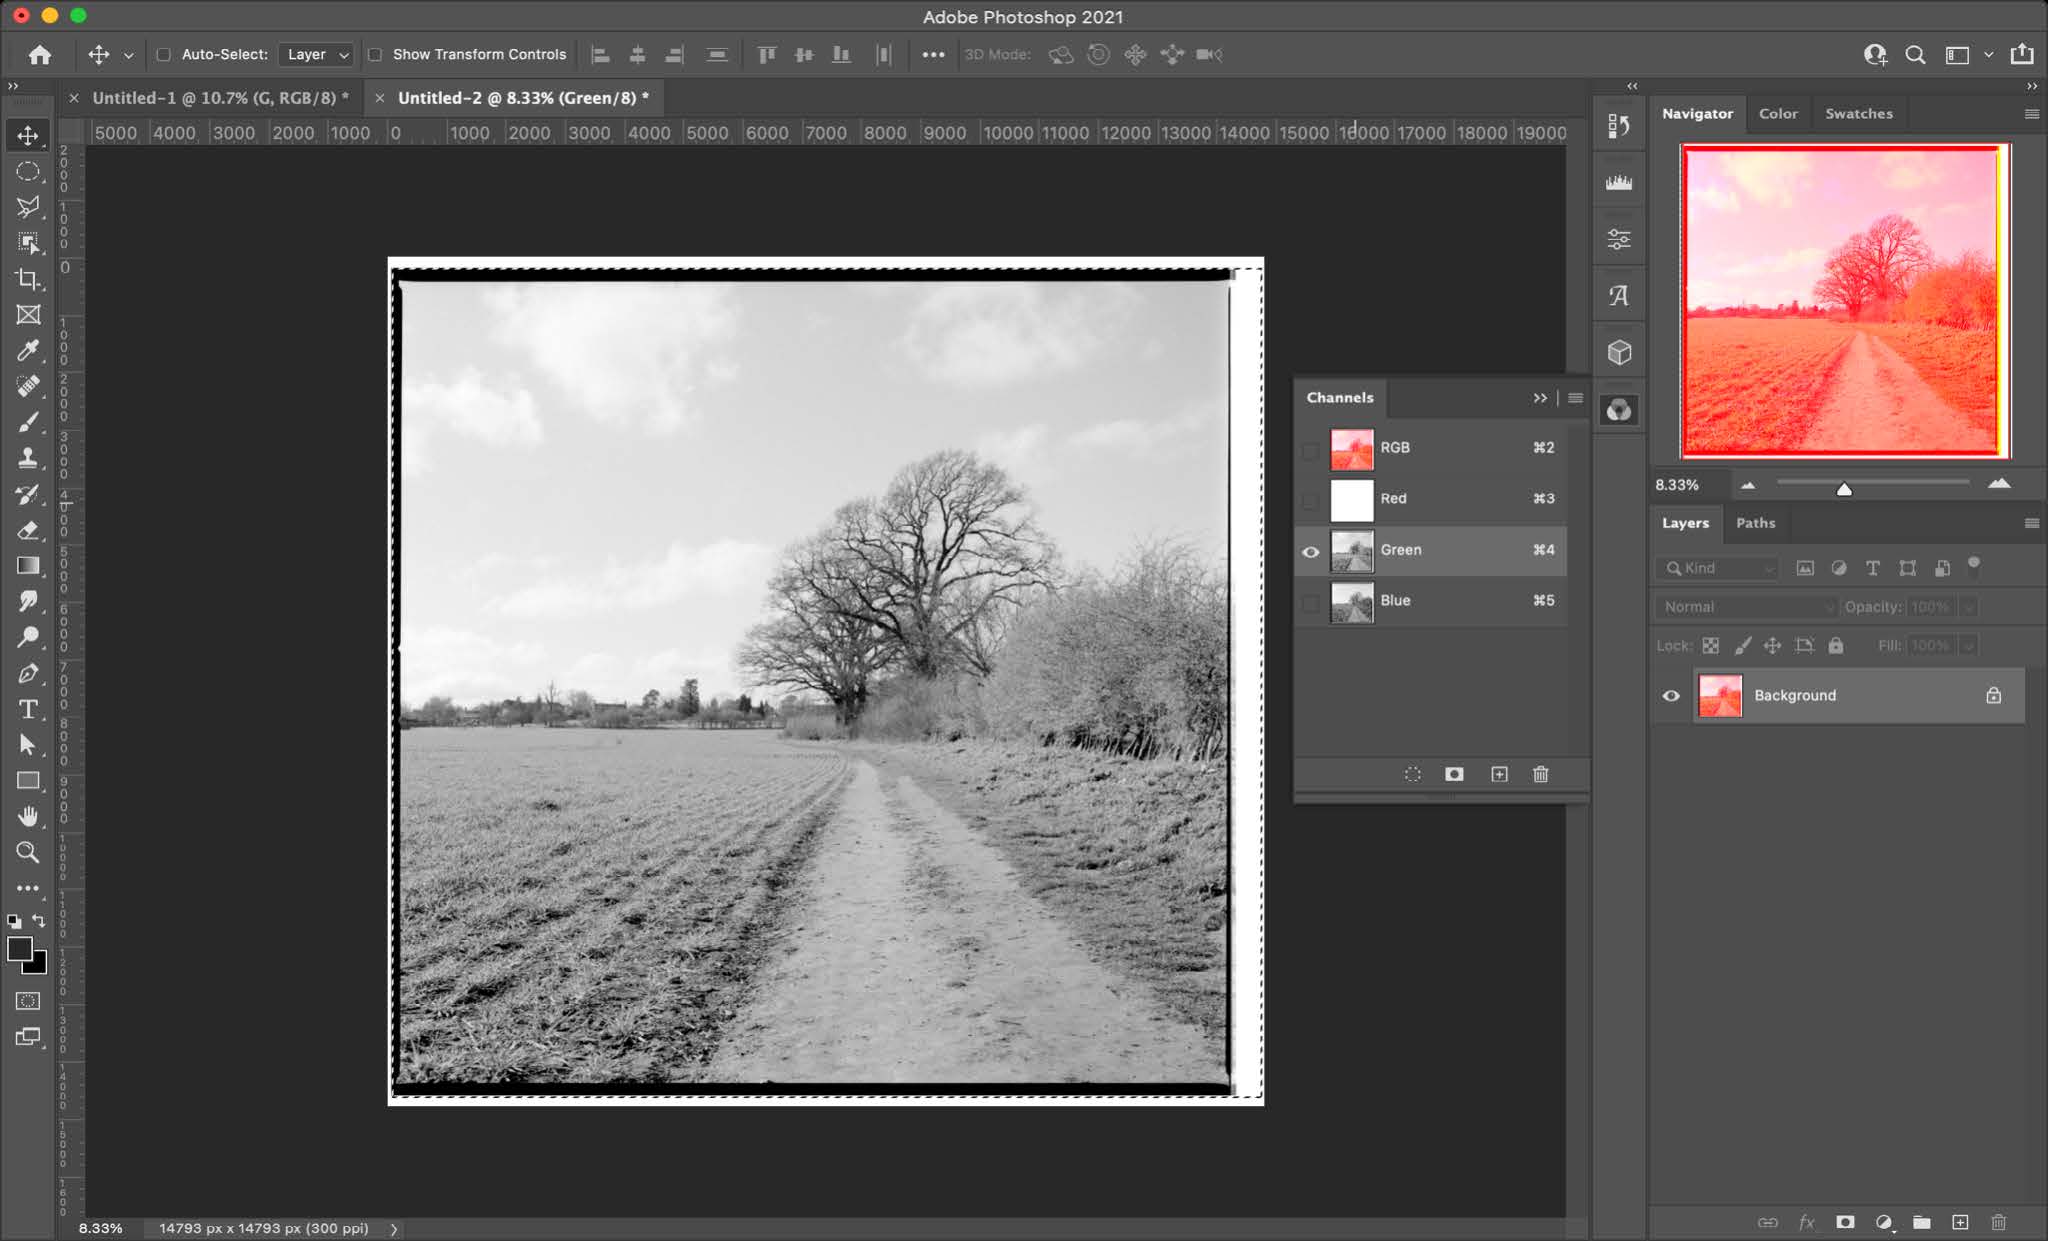
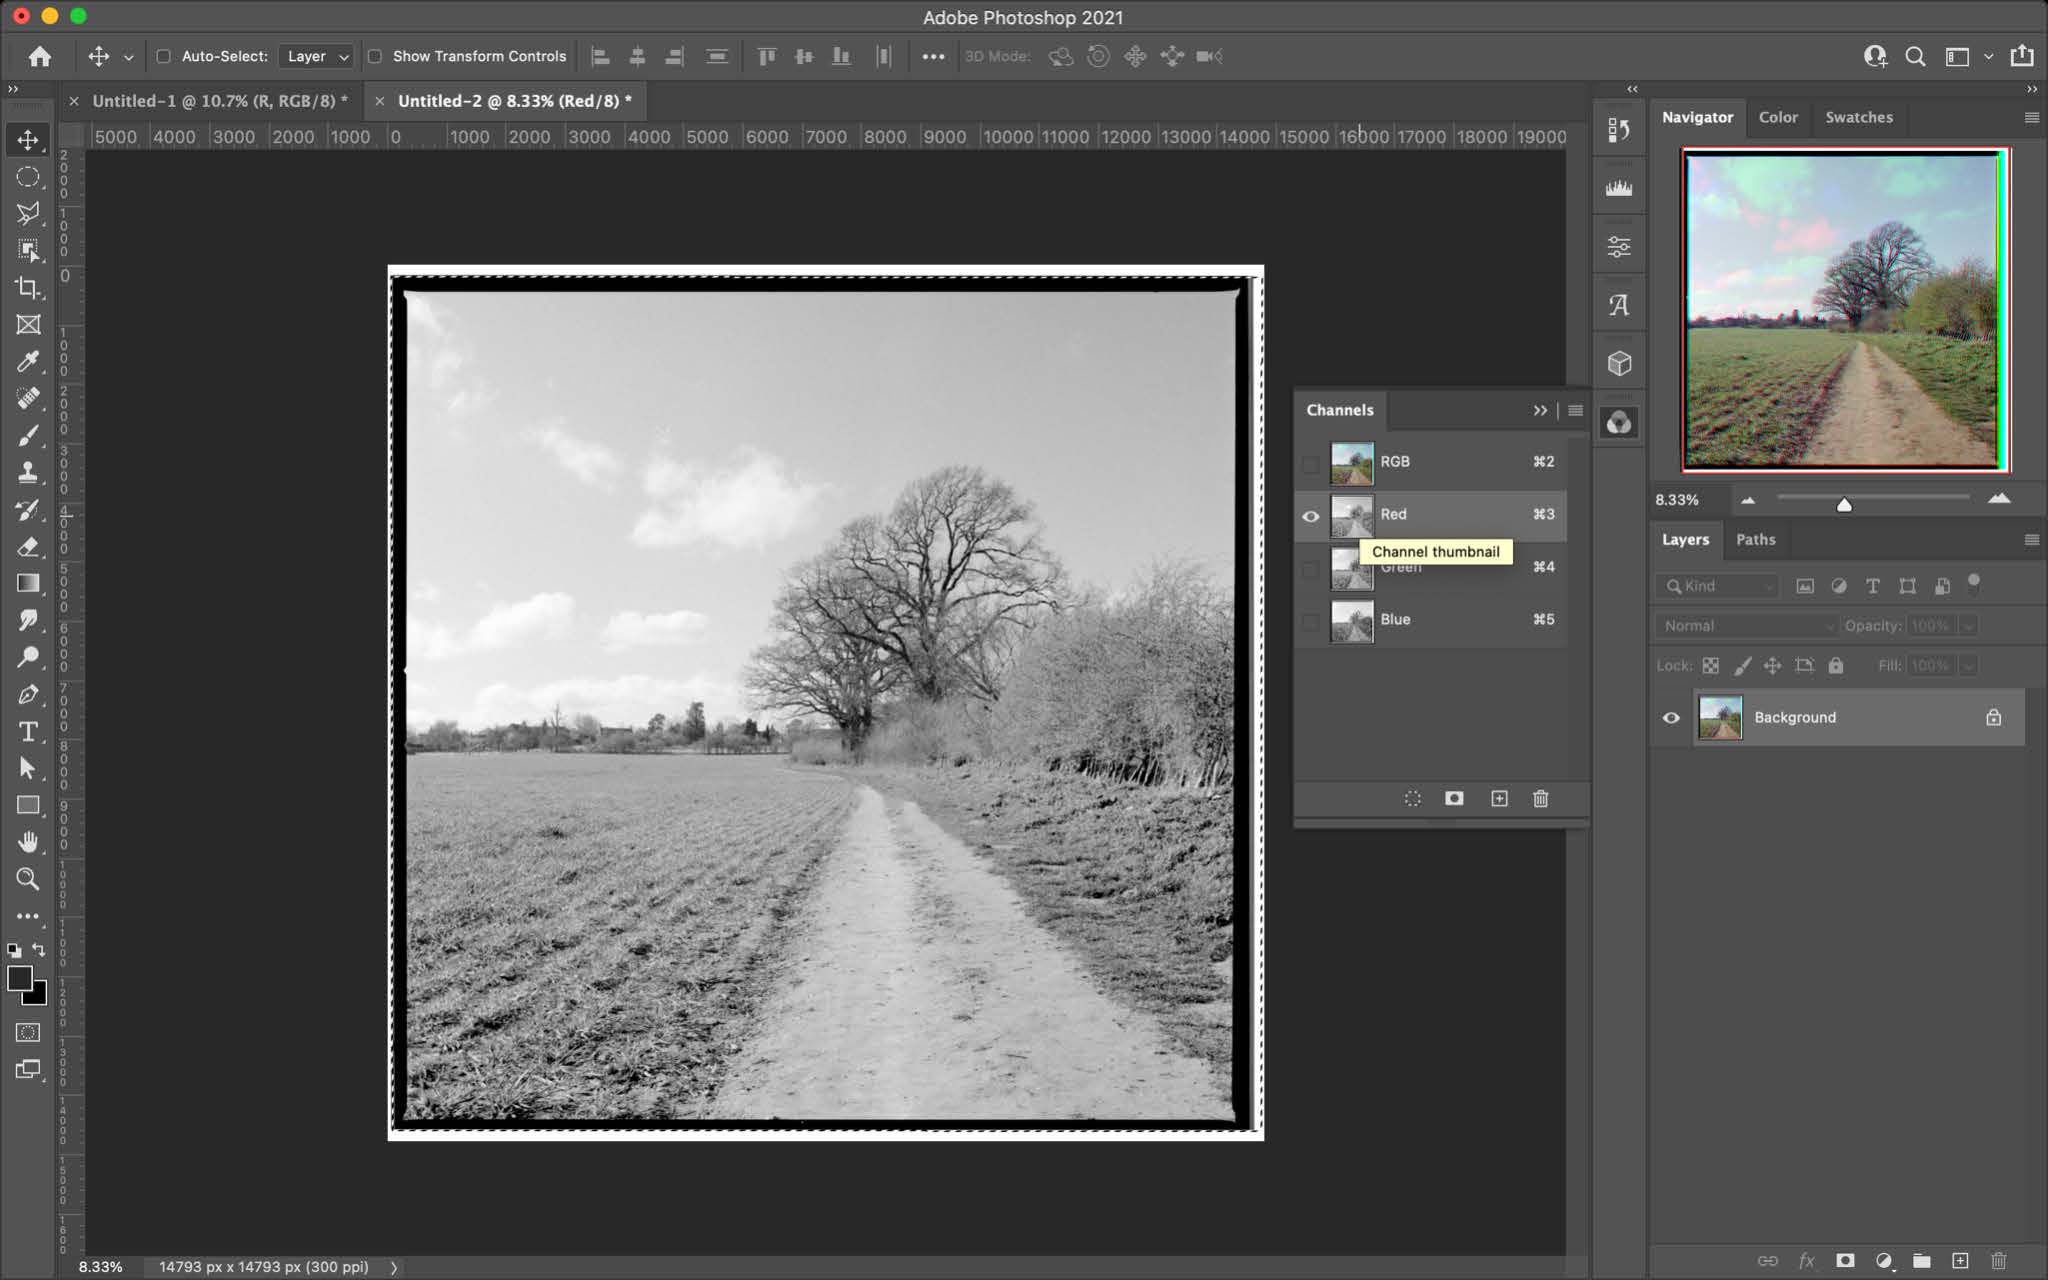
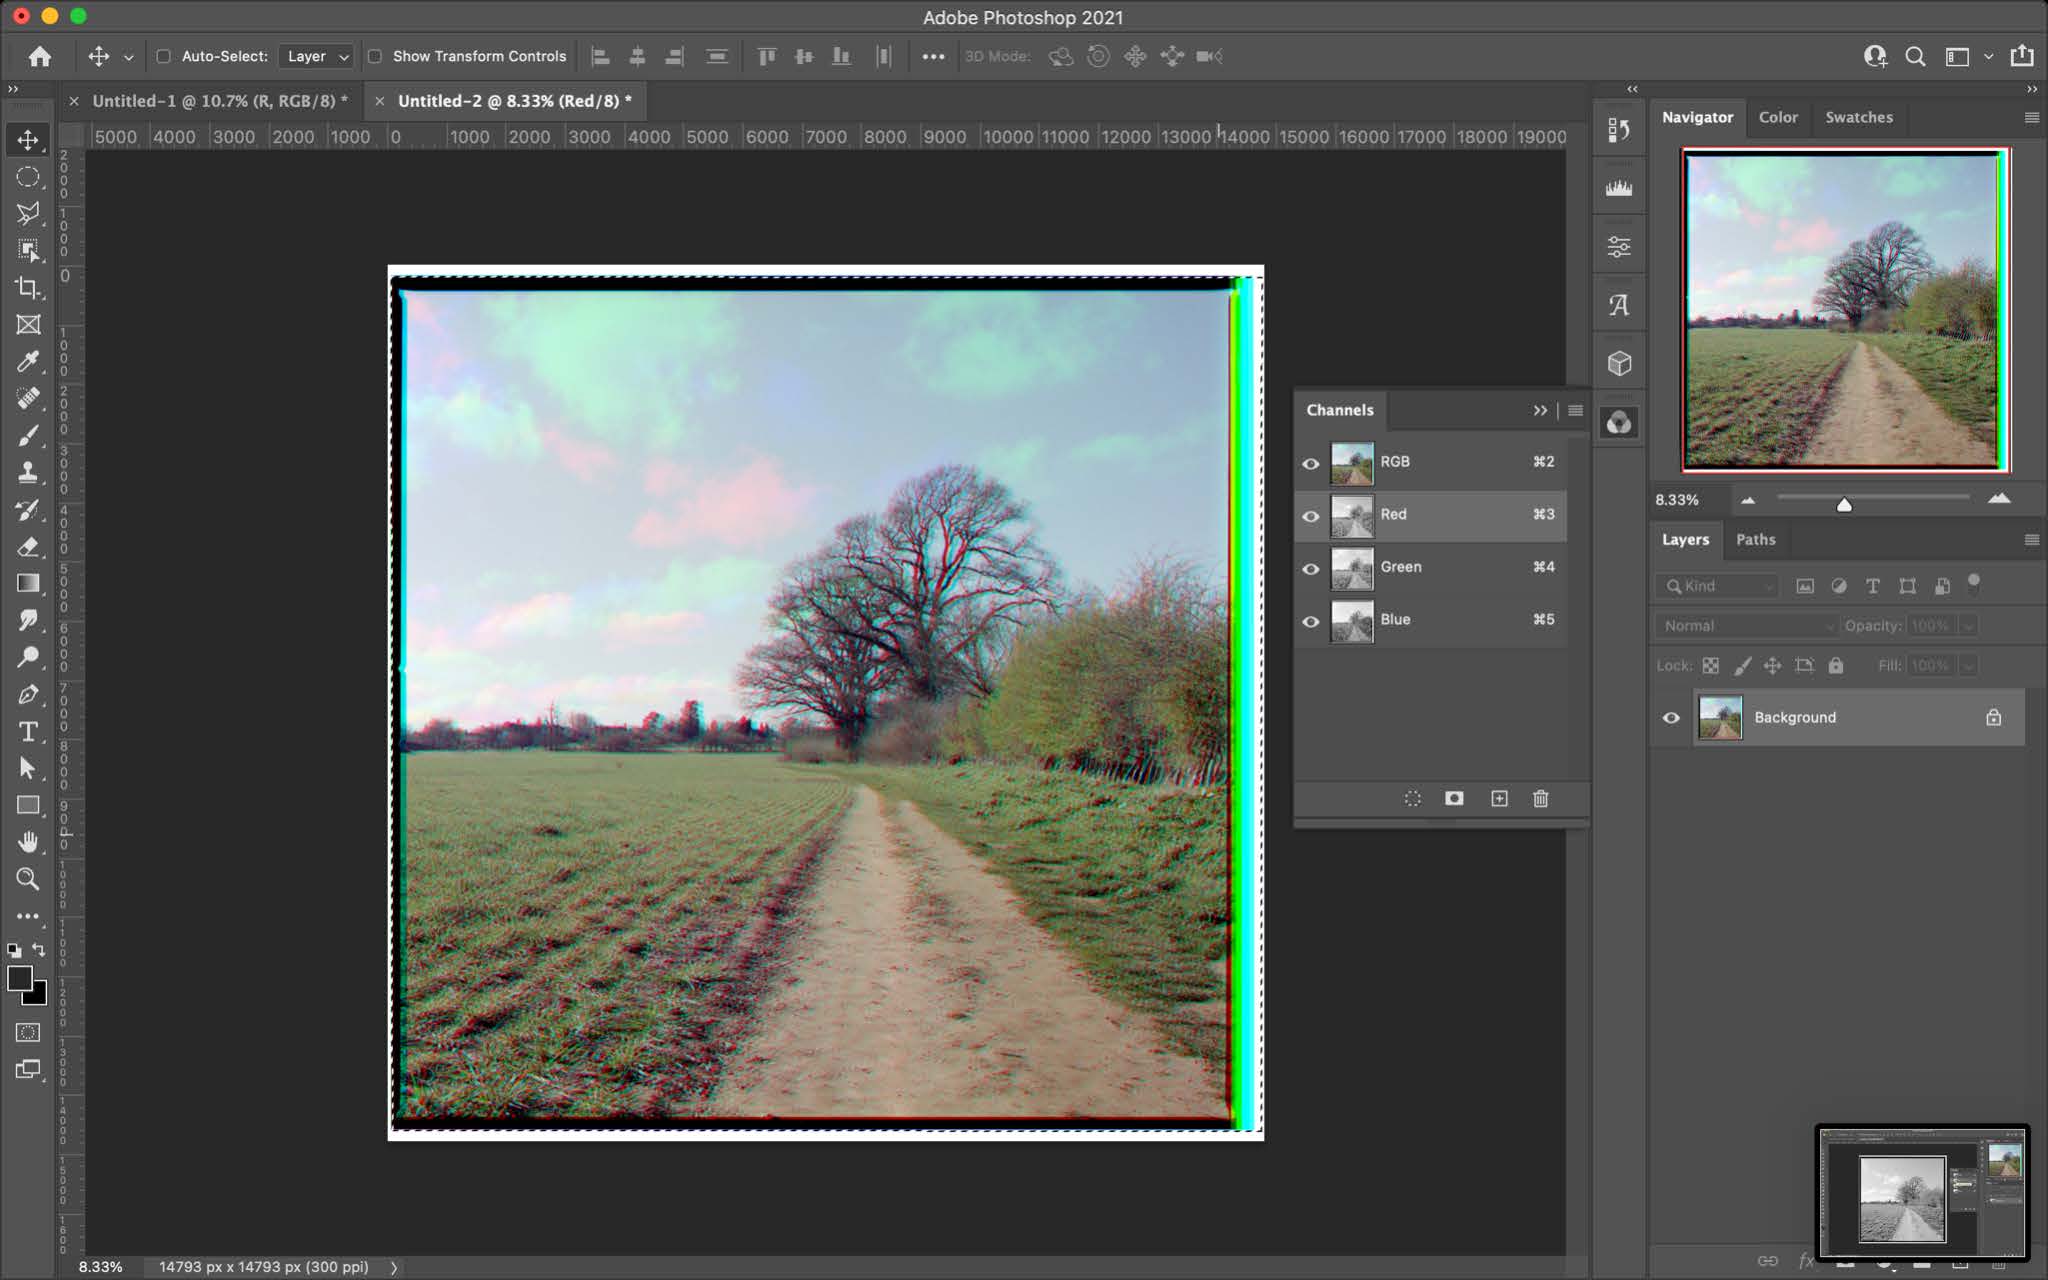
Create a new canvas. Be sure to make the size of the new canvas the same size as the stacked images and open the channel panel.

Go back to the stacked images and show only your blue layer, select all and copy. Now go back into your new file and go to the channel panel and select only the blue channel and hit paste.

Repeat this for the green and red channels and you should have a colour image.

METHOD 2
You will then need to convert each layer into a smart object. This step isn’t necessary but helps with any adjustments you need to make later on.

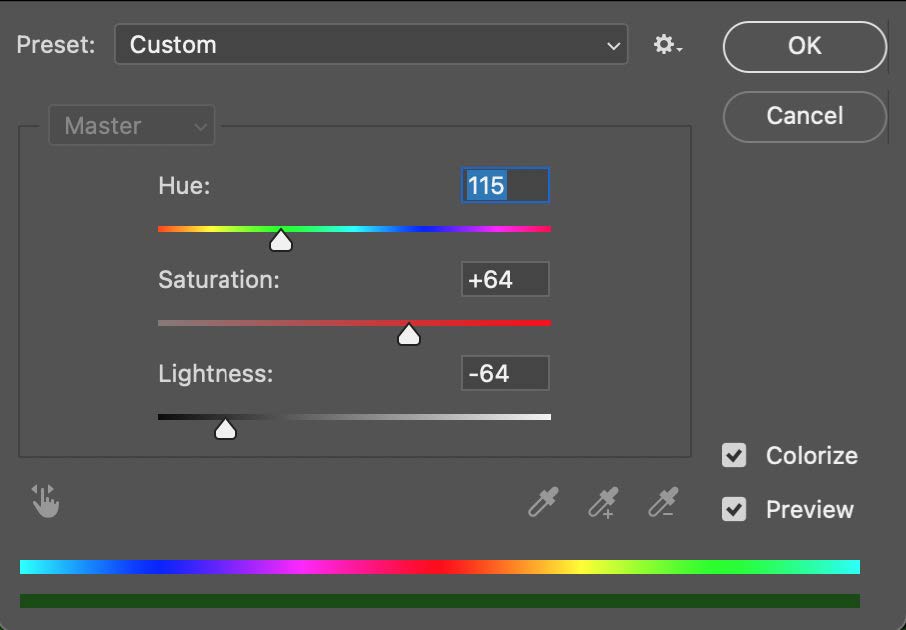
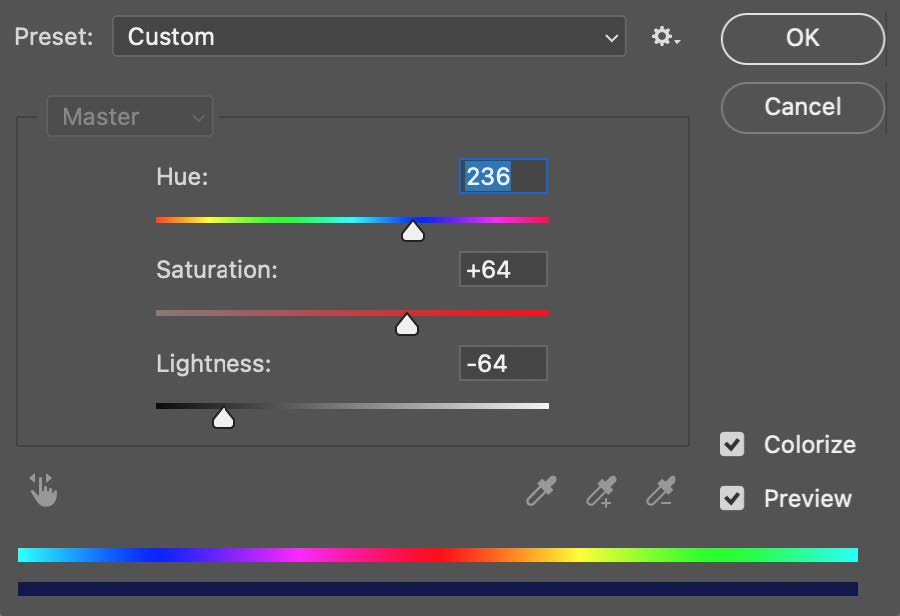
Selecting one layer at a time, then using the shortcut cmd+u/crl+u. This should bring up the Hue/Saturation box. You need to click the colorize box. Slide the top slider to the corresponding colour of the named layer, eg: the image shot with the red filter needs to be red.

I have found through experimentation that the saturation slider position has to be in a positive number whereas the lightness slider has to be in a negative position.

The following is a good starting base that I have found for my images.
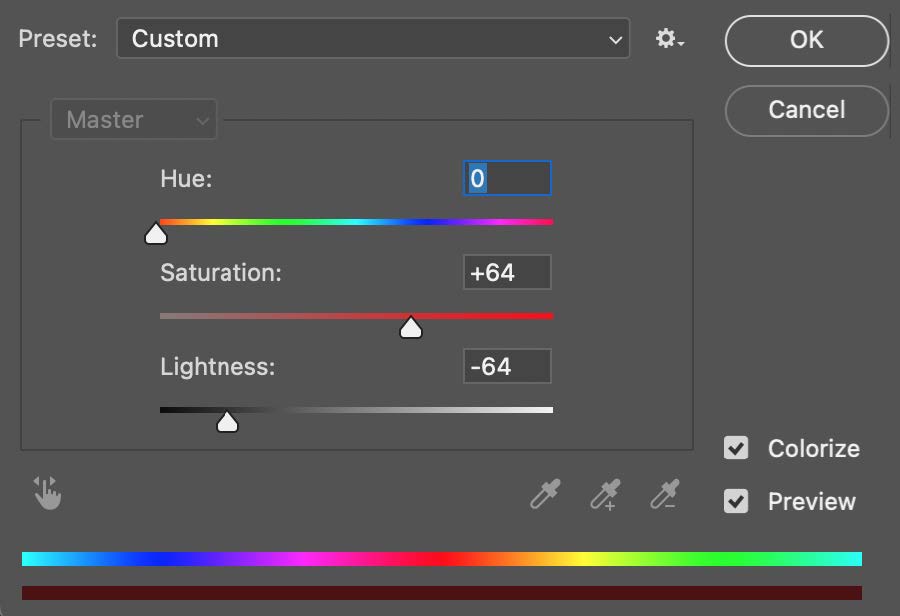
RedGreenBlue


Once all the layers are colour coordinated the magic can begin!

Select all the layers and change the blending mode to Lighten. Et Voila! You should see a colour image.

FINAL TOUCHES
The reason for converting each layer into a smart object in method 2 is so if needed, the hue saturation and brightness of each later can be adjusted. I typically like to add a gentle S curve, brightness adjustment layer and do some general adjustments to taste.

That's how to shoot colour photos with black and white film.

ODDITIES
Don’t be disheartened if your images are not the correct colour. On overcast days I have found that images come through really purple so I reduce the saturation of the blue and red layers and shift the blue slightly more towards cyan.
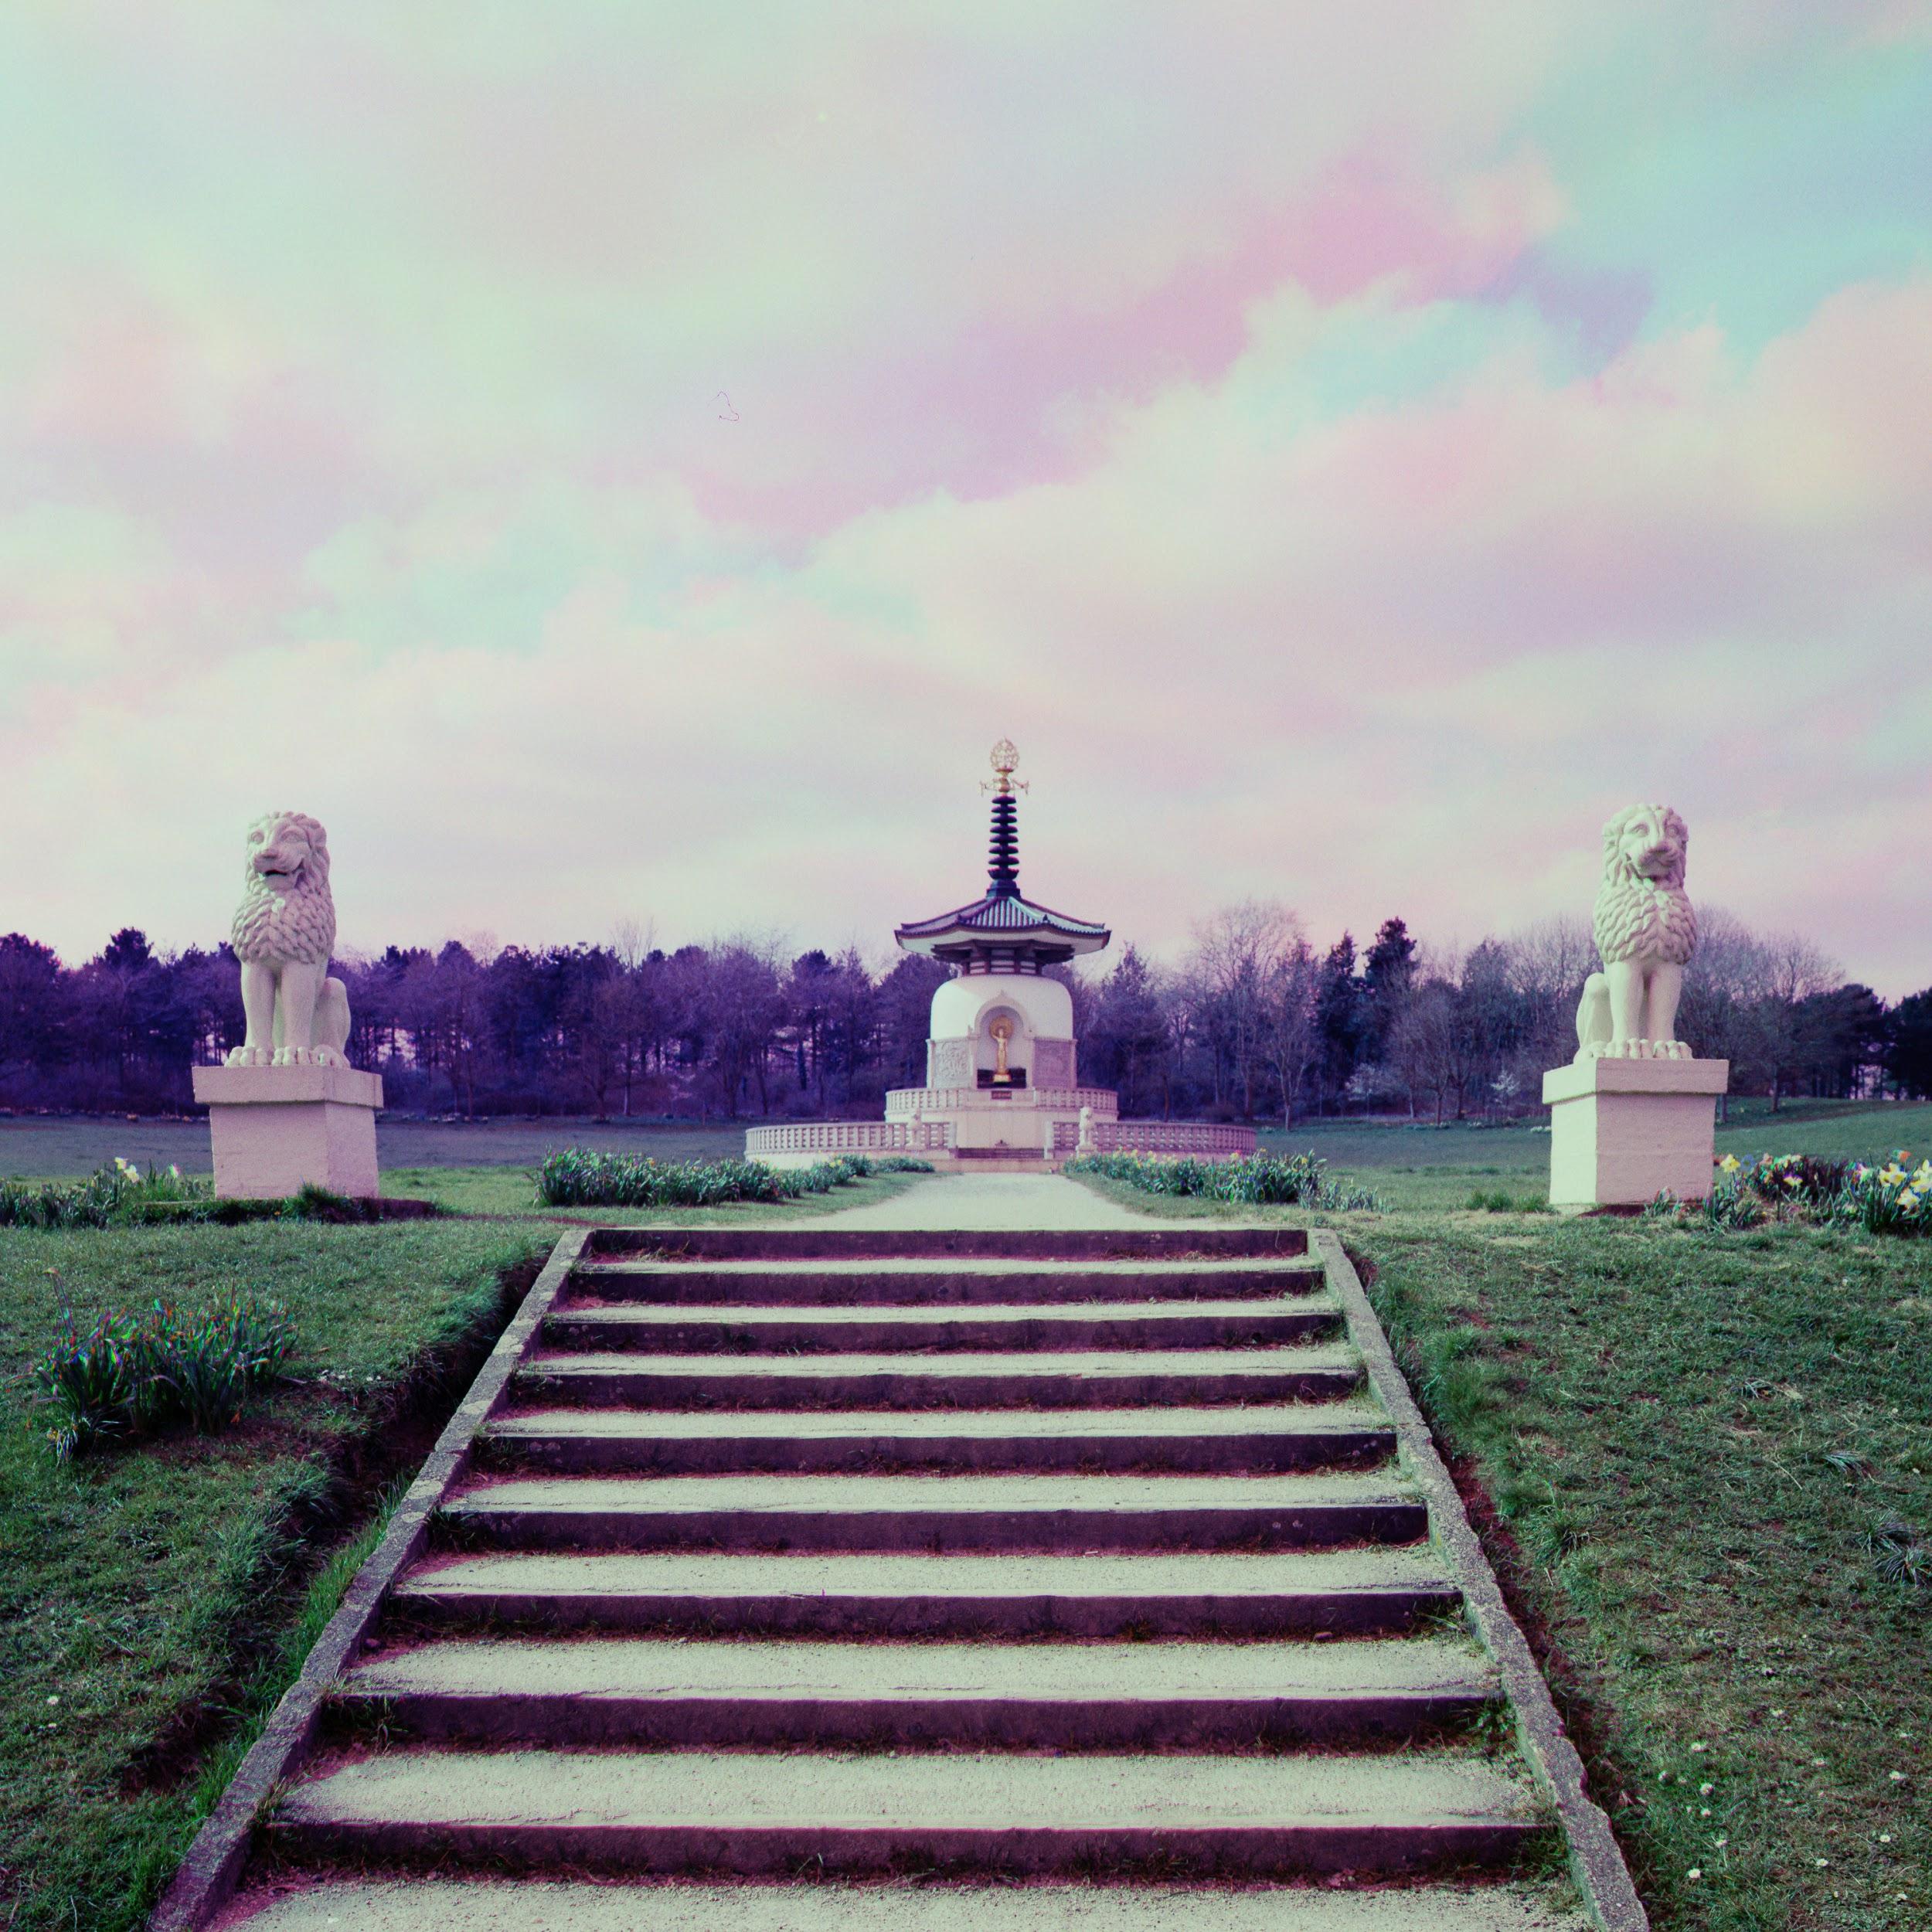
On the left the bare trees in the background are more purple.
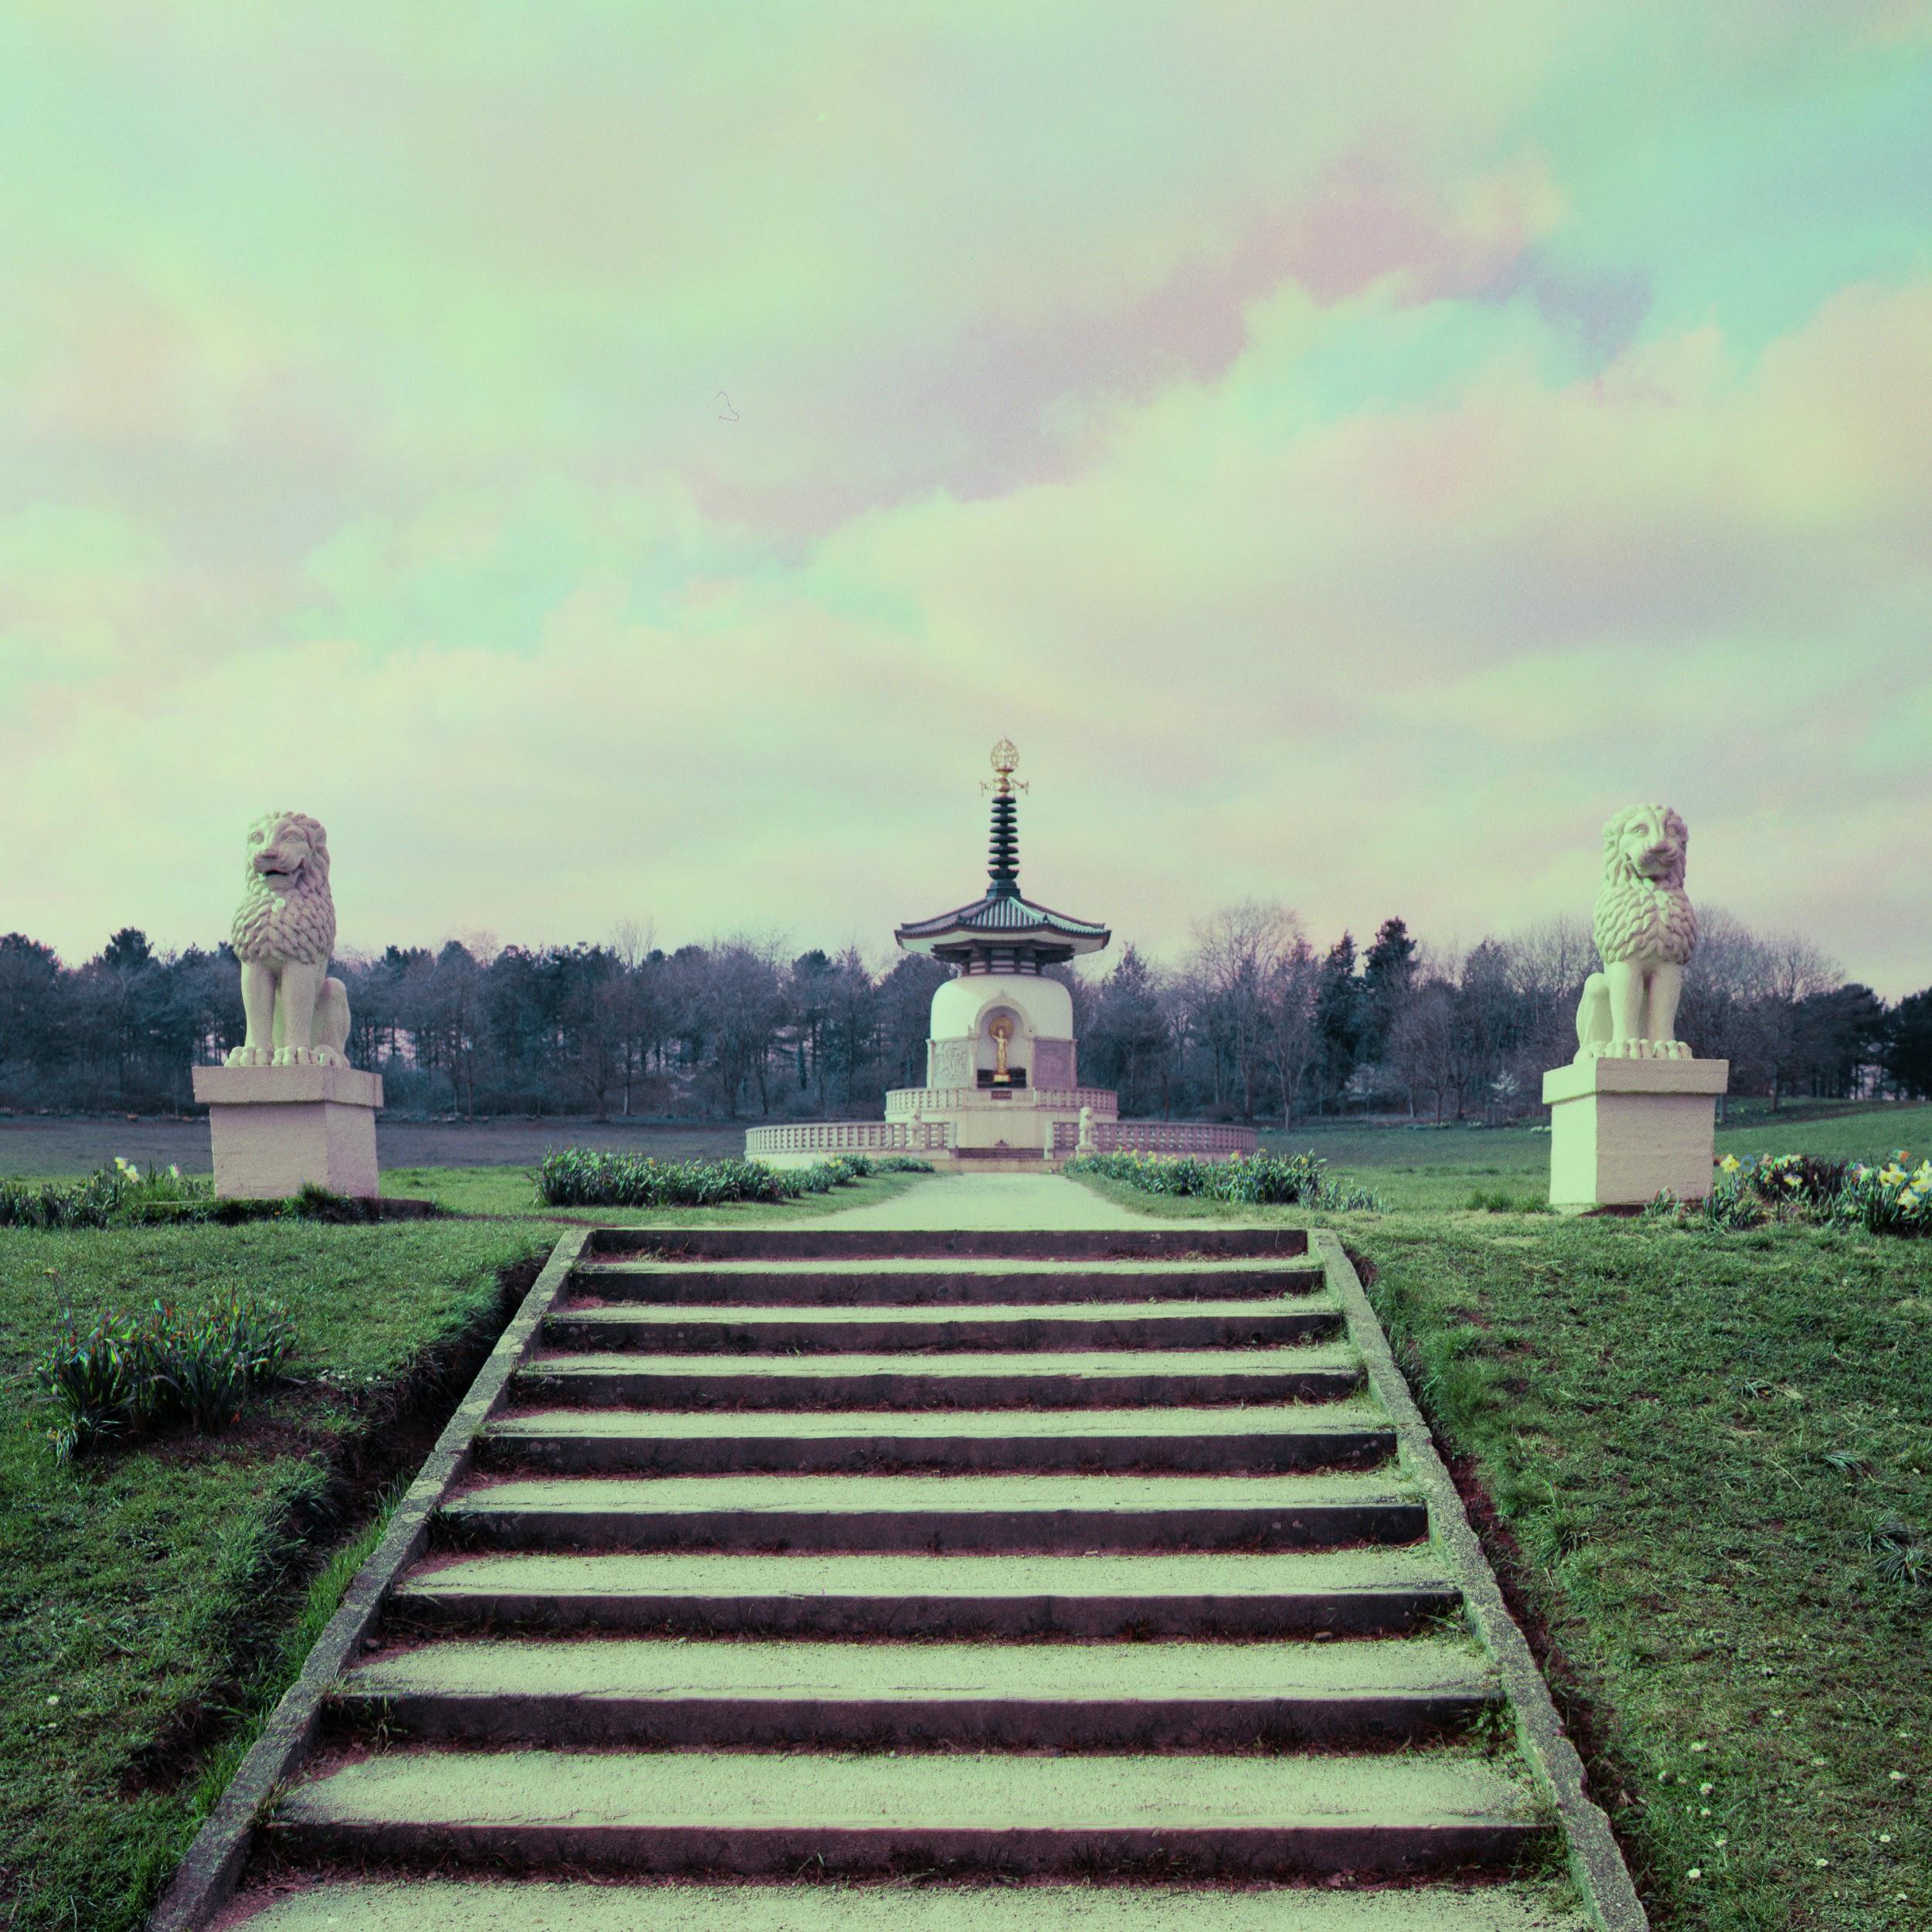

On the right I reduced the saturation and shifted red and blue hues


Taken with HP5 and Zeiss Distagon 50mm FLE

PRIMARILY A BLACK AND WHITE SHOOTER
I am primarily a black and white shooter and I dislike colour correction so I am sure someone with more experience could get a better result than I did. In a way I prefer the more abstractpurple shot but at the end of the day it is all down to personal taste.

You will also get strange harris shutter-esque banding arising in certain areas. This may be down to the cloud coverage or light changing whilst swapping filters.
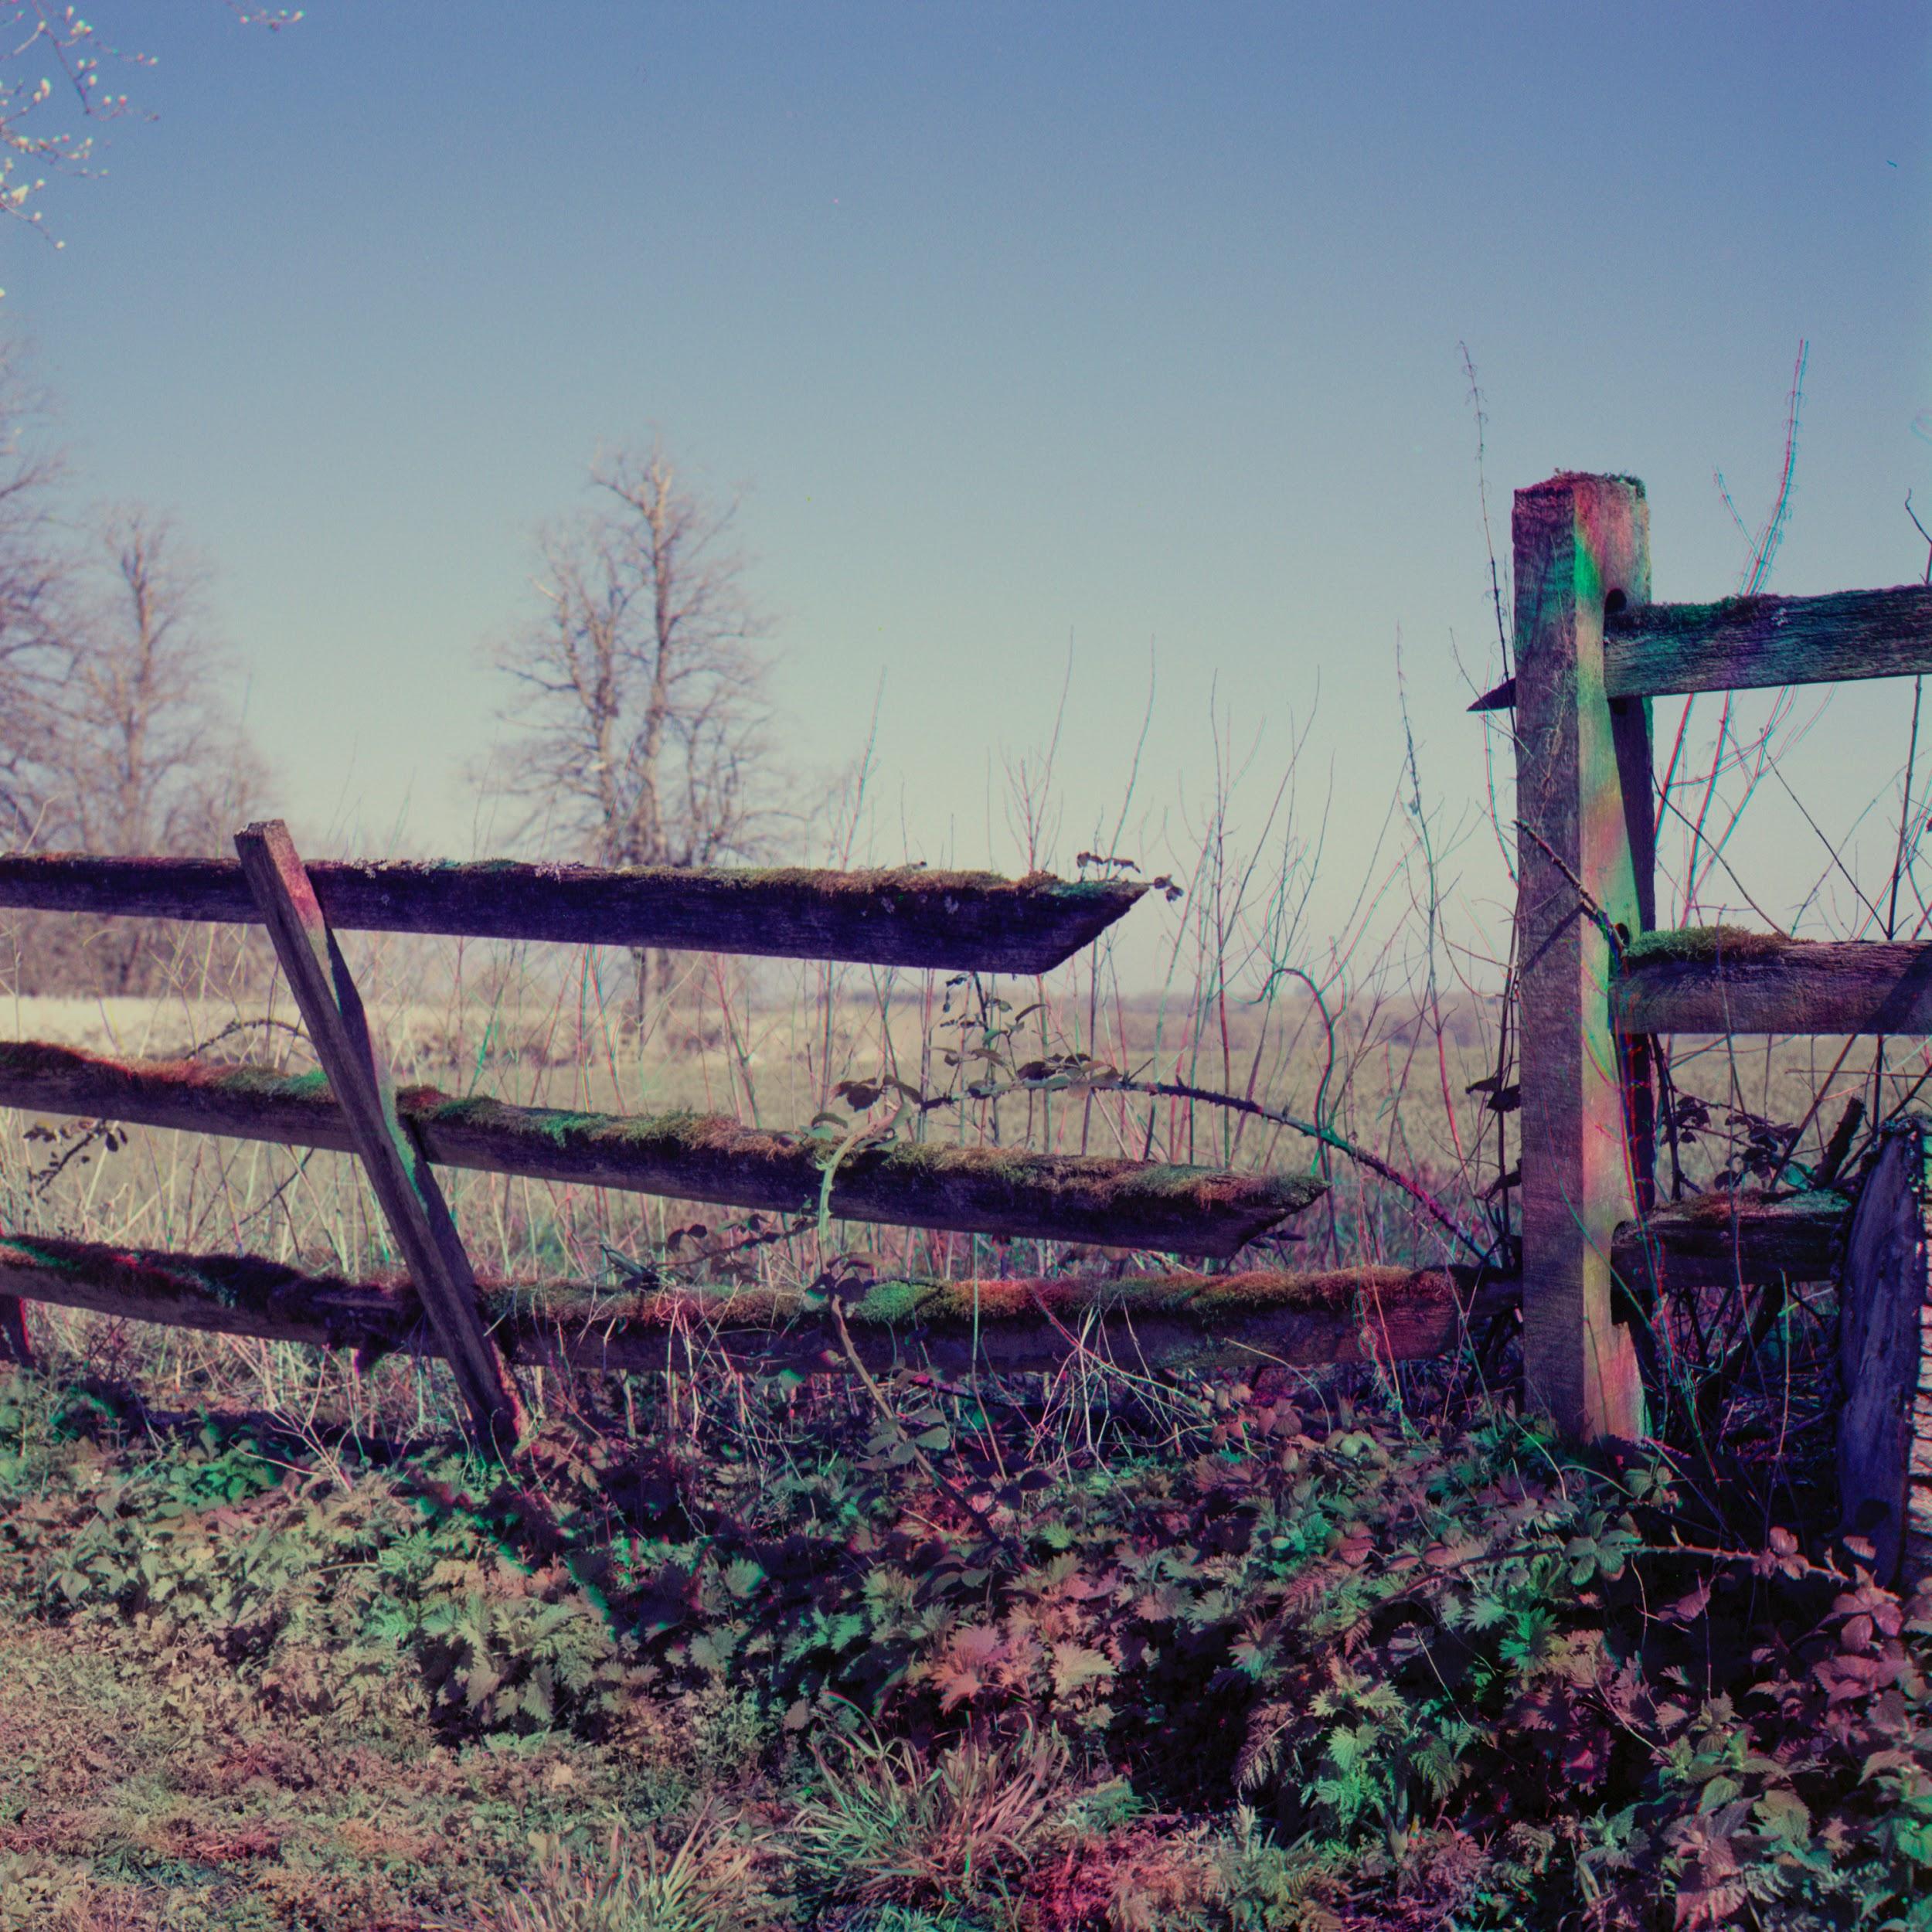
SFX 80mm Planar

IN CONCLUSION
This is a very long and laborious way of taking a colour image but at the same time it's exciting and experimental.That being said it is not a very economical process, you get less images on a roll of film, in my case four 6x6 colour images from a roll of 120 or 12 colour images on a 36
exposure film.

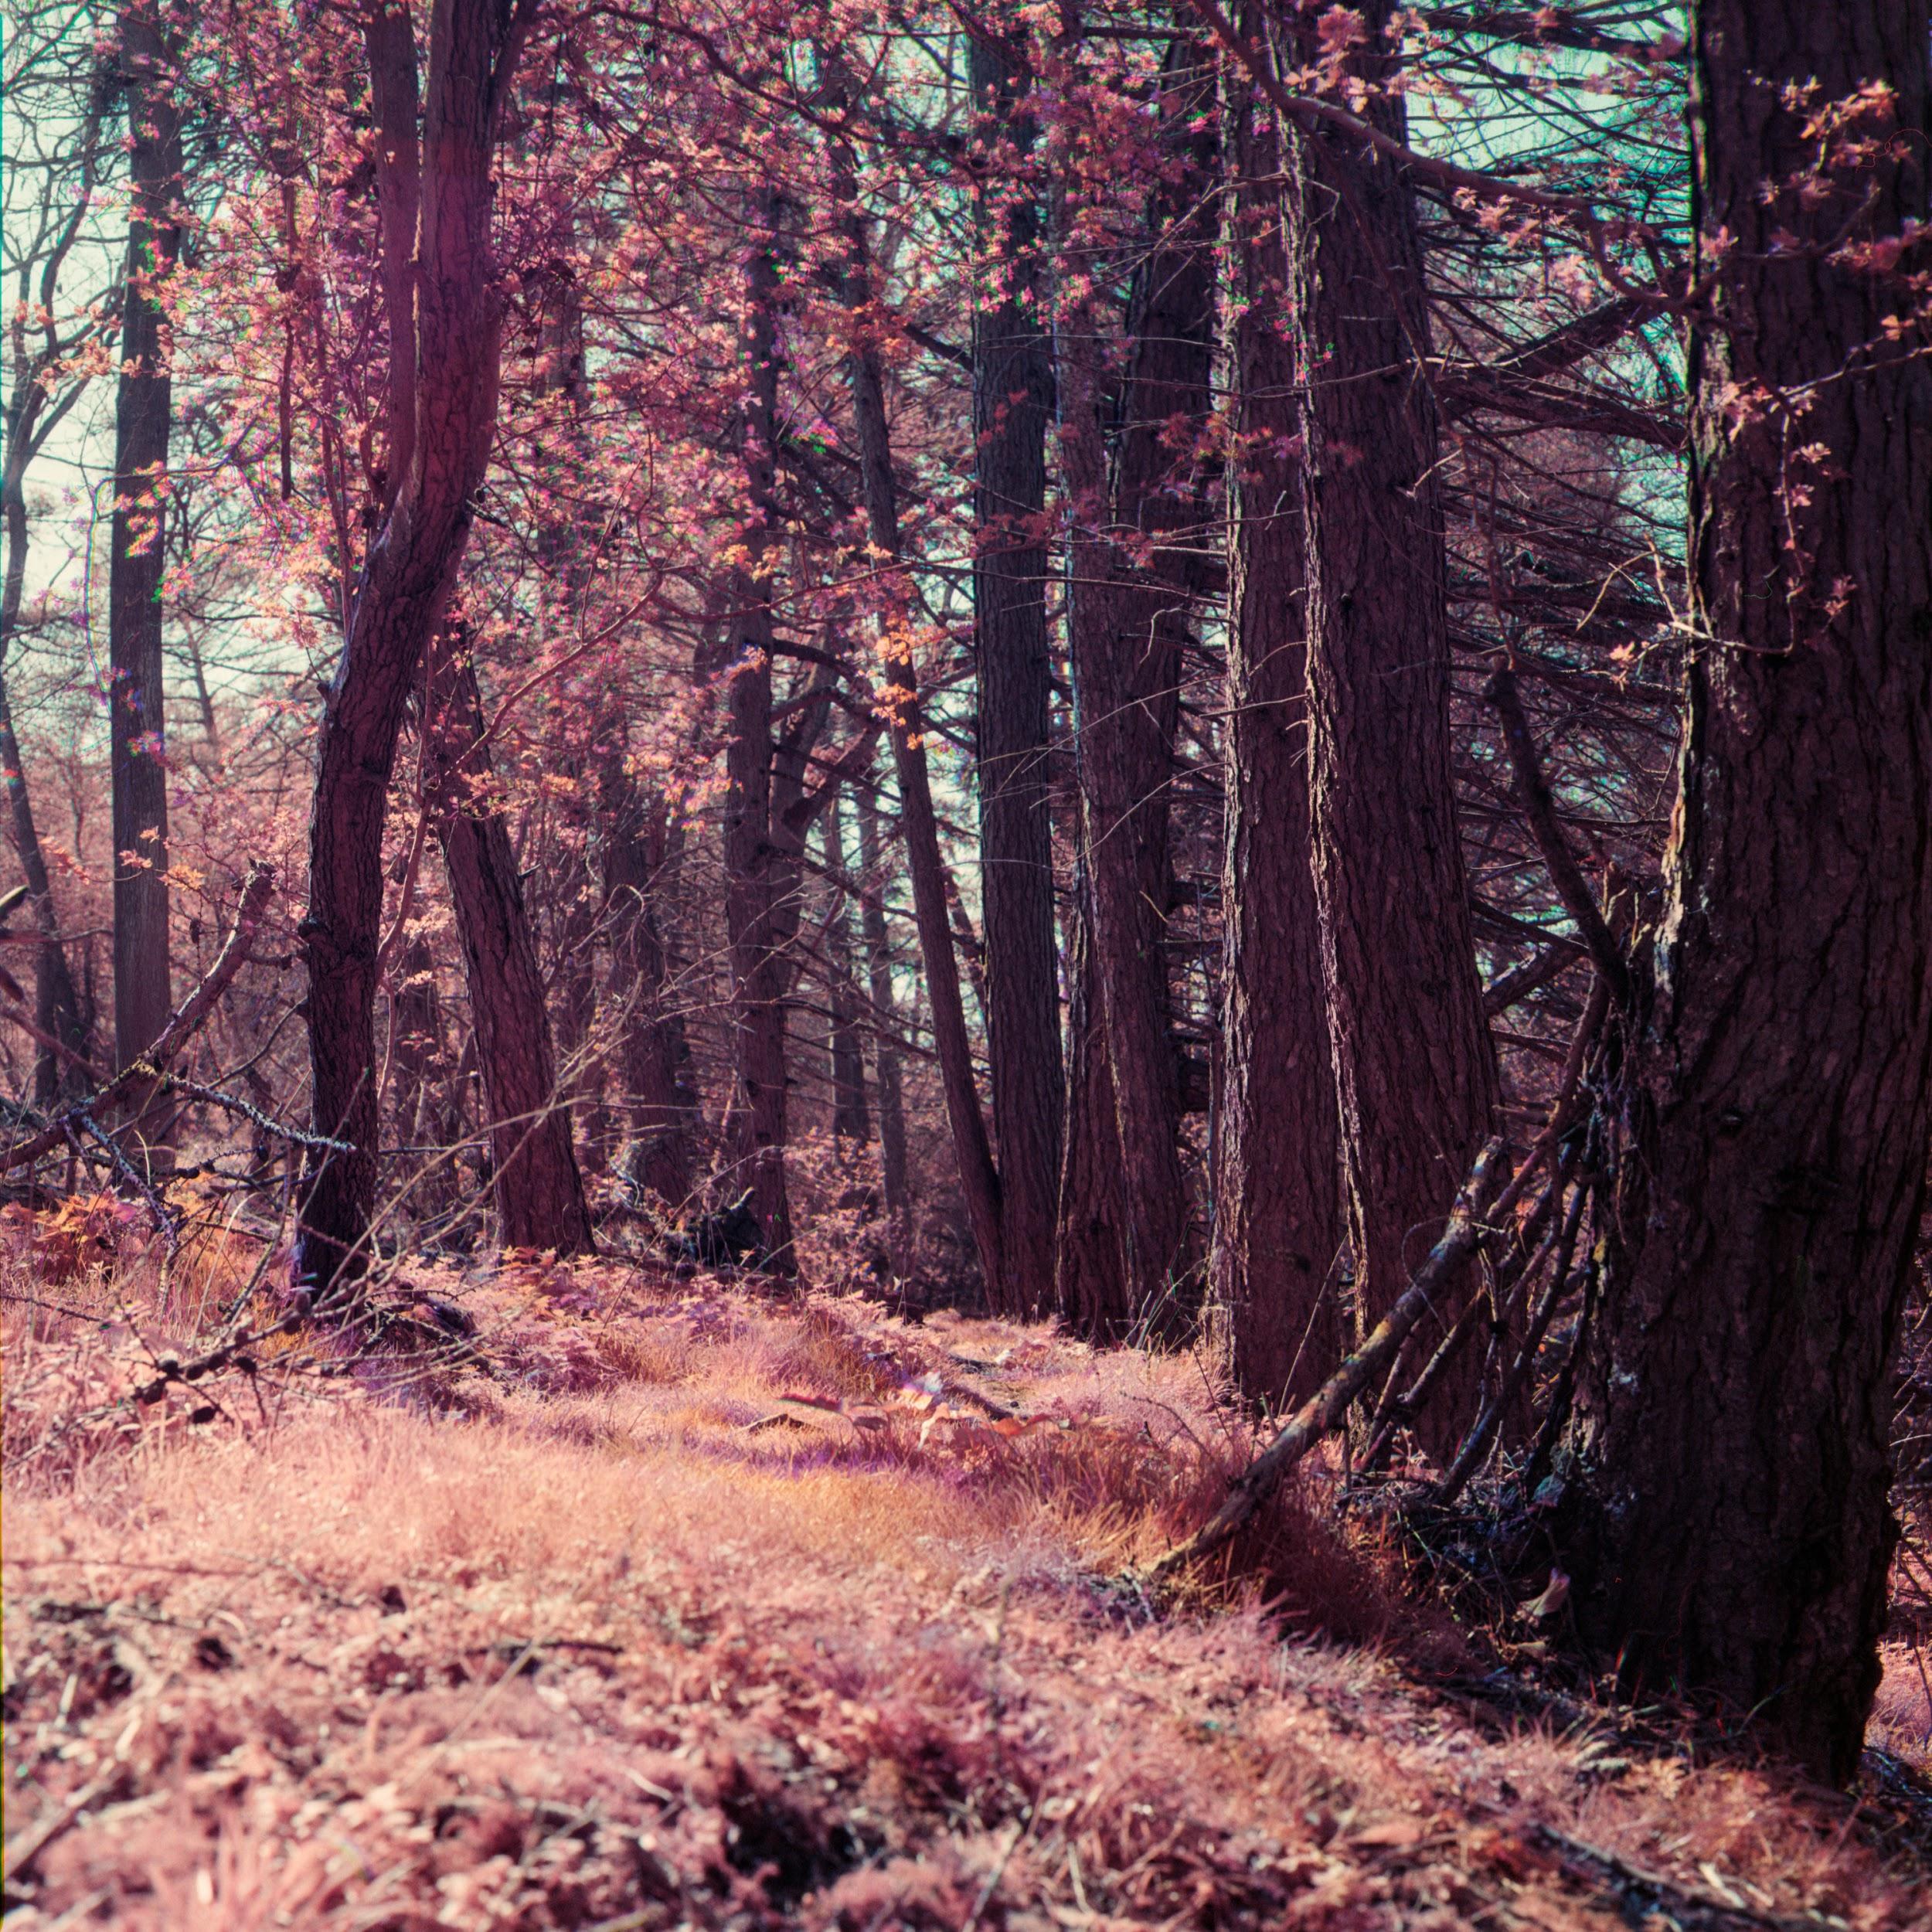
I shot with both HP5 and SFX and found I had the best results with the HP5. This might be down to the fact that SFX has an extended sensitivity to red wavelength of light but I found that the majority of my images became harder to control.
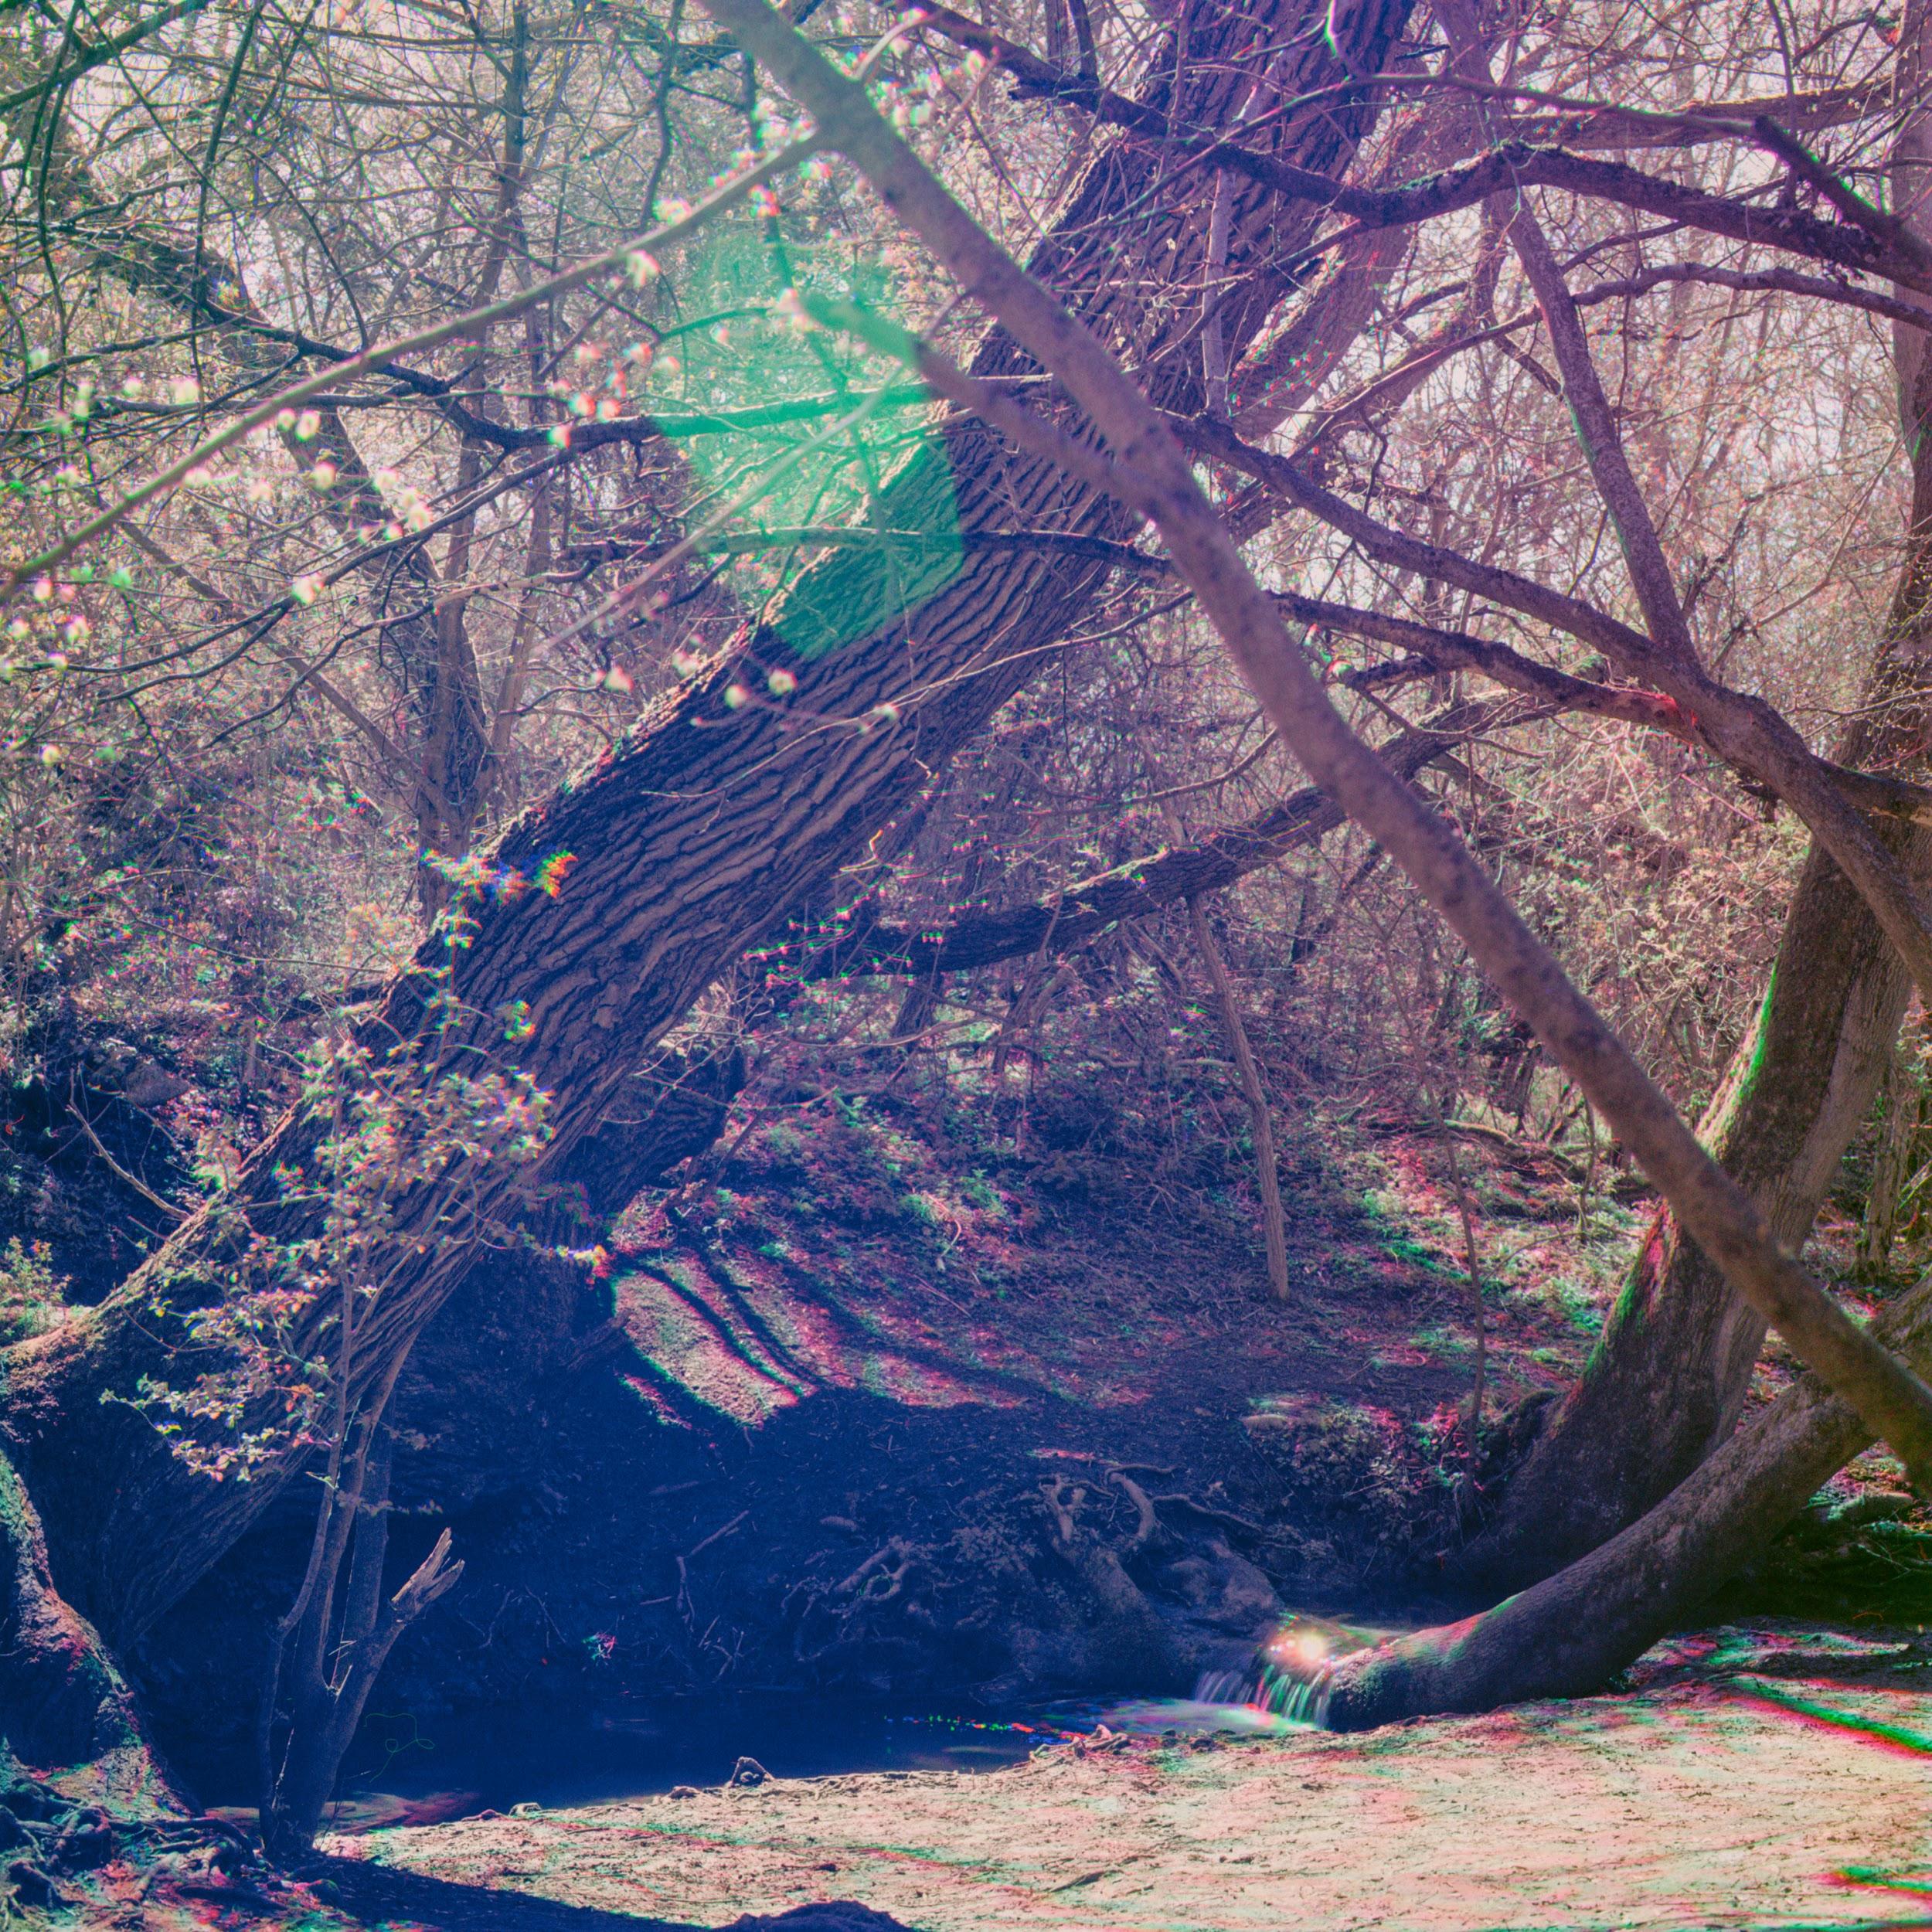
SFX 80mm Planar

At the start of this article I mentioned that this process is over 150 years old. I stumbled across it a few years ago but I only experimented with it when I purchased a new camera system and wanted to standardise the size of my filters. Jasper Fforde wrote an article on his website which I read and referenced before trying the process of myself.
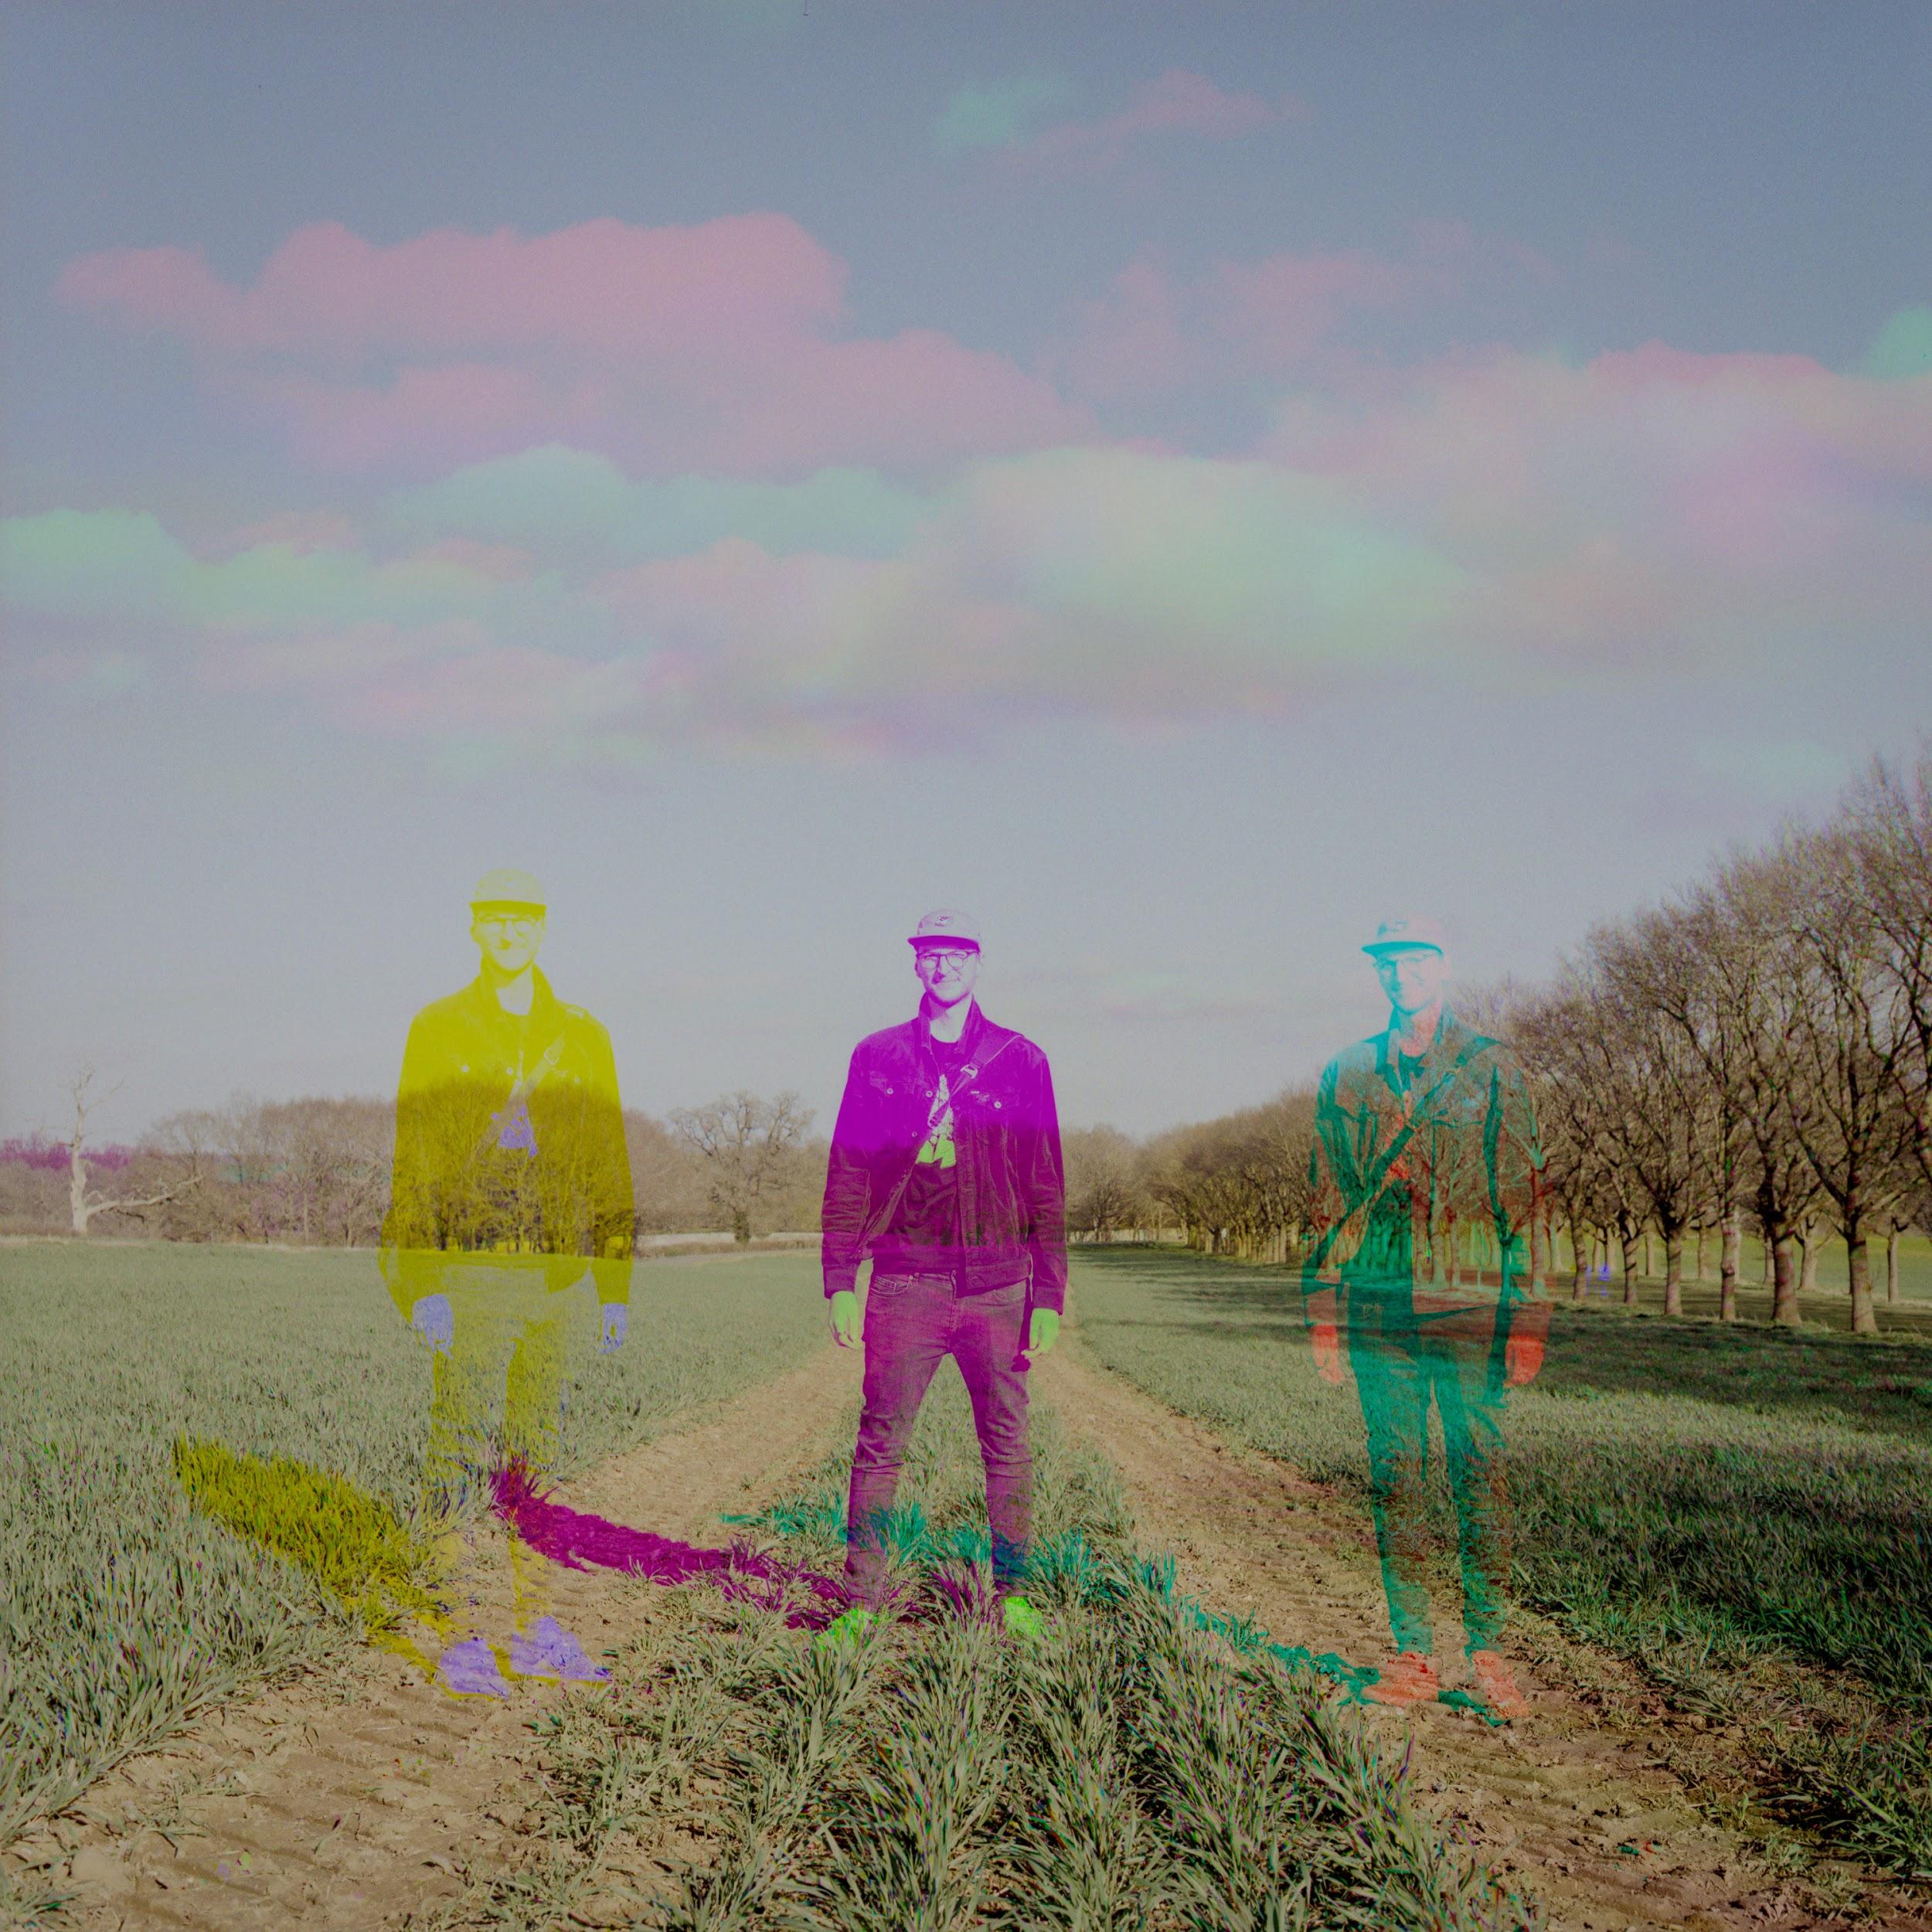
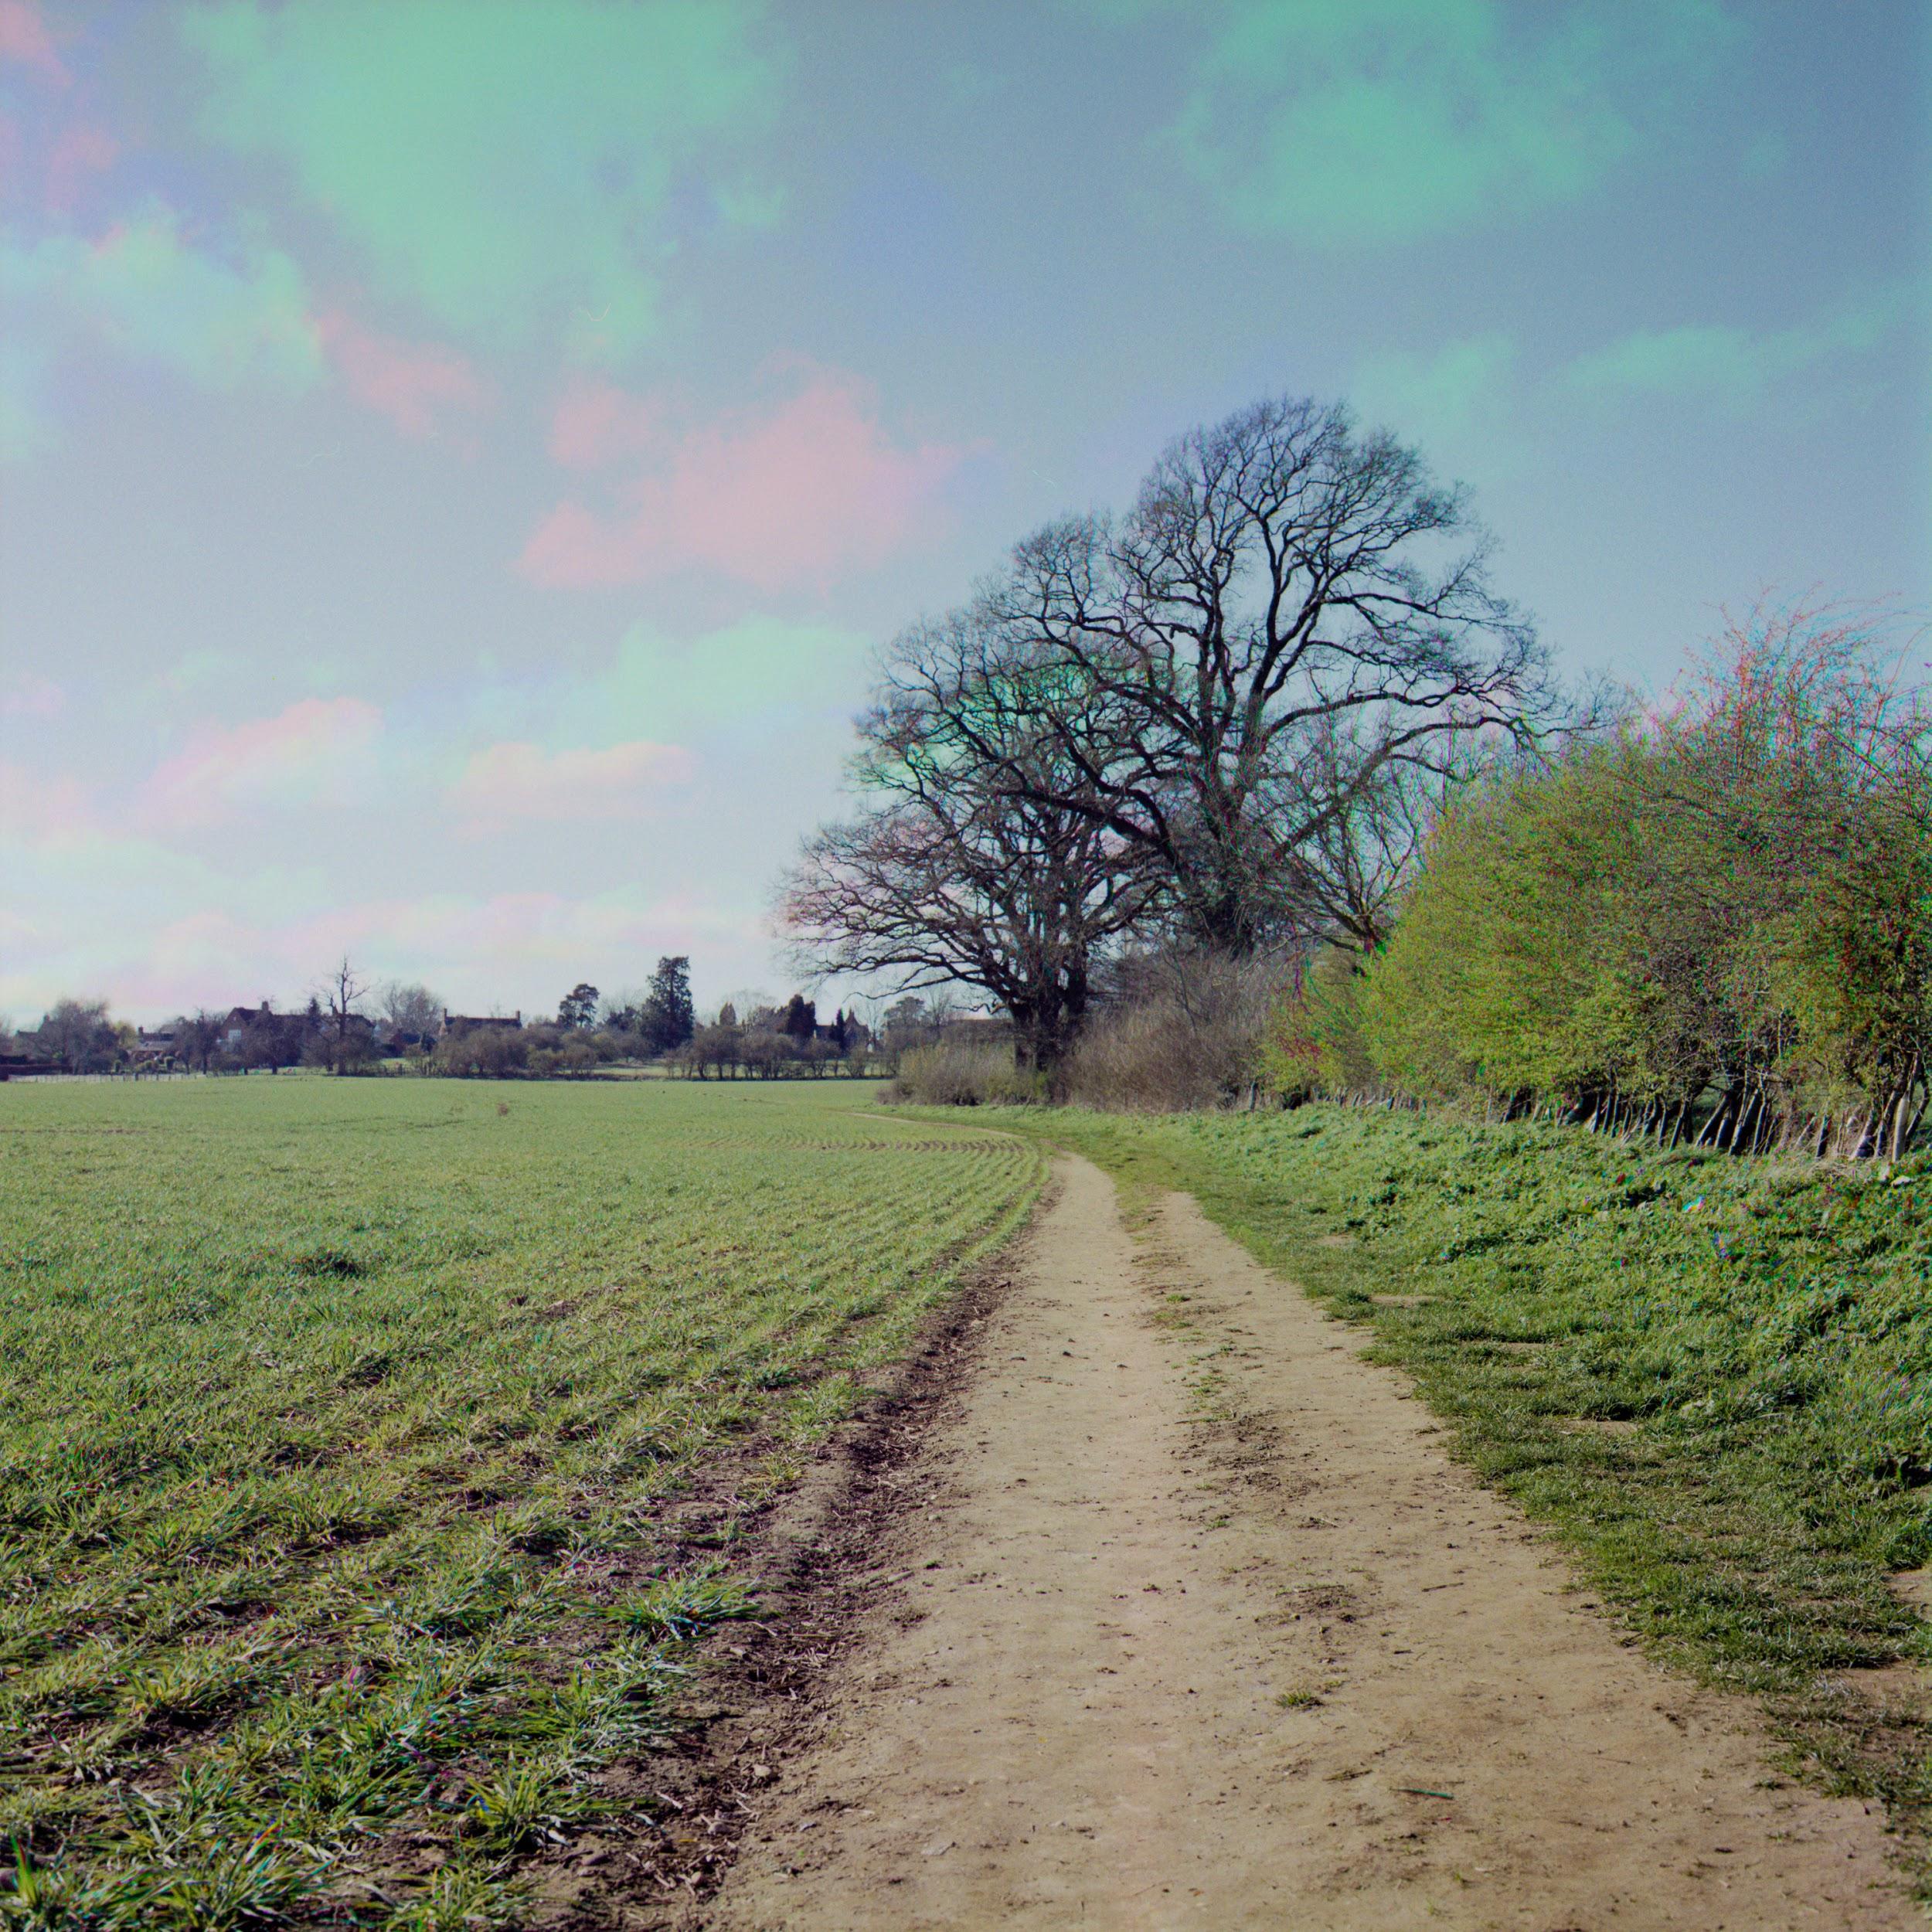
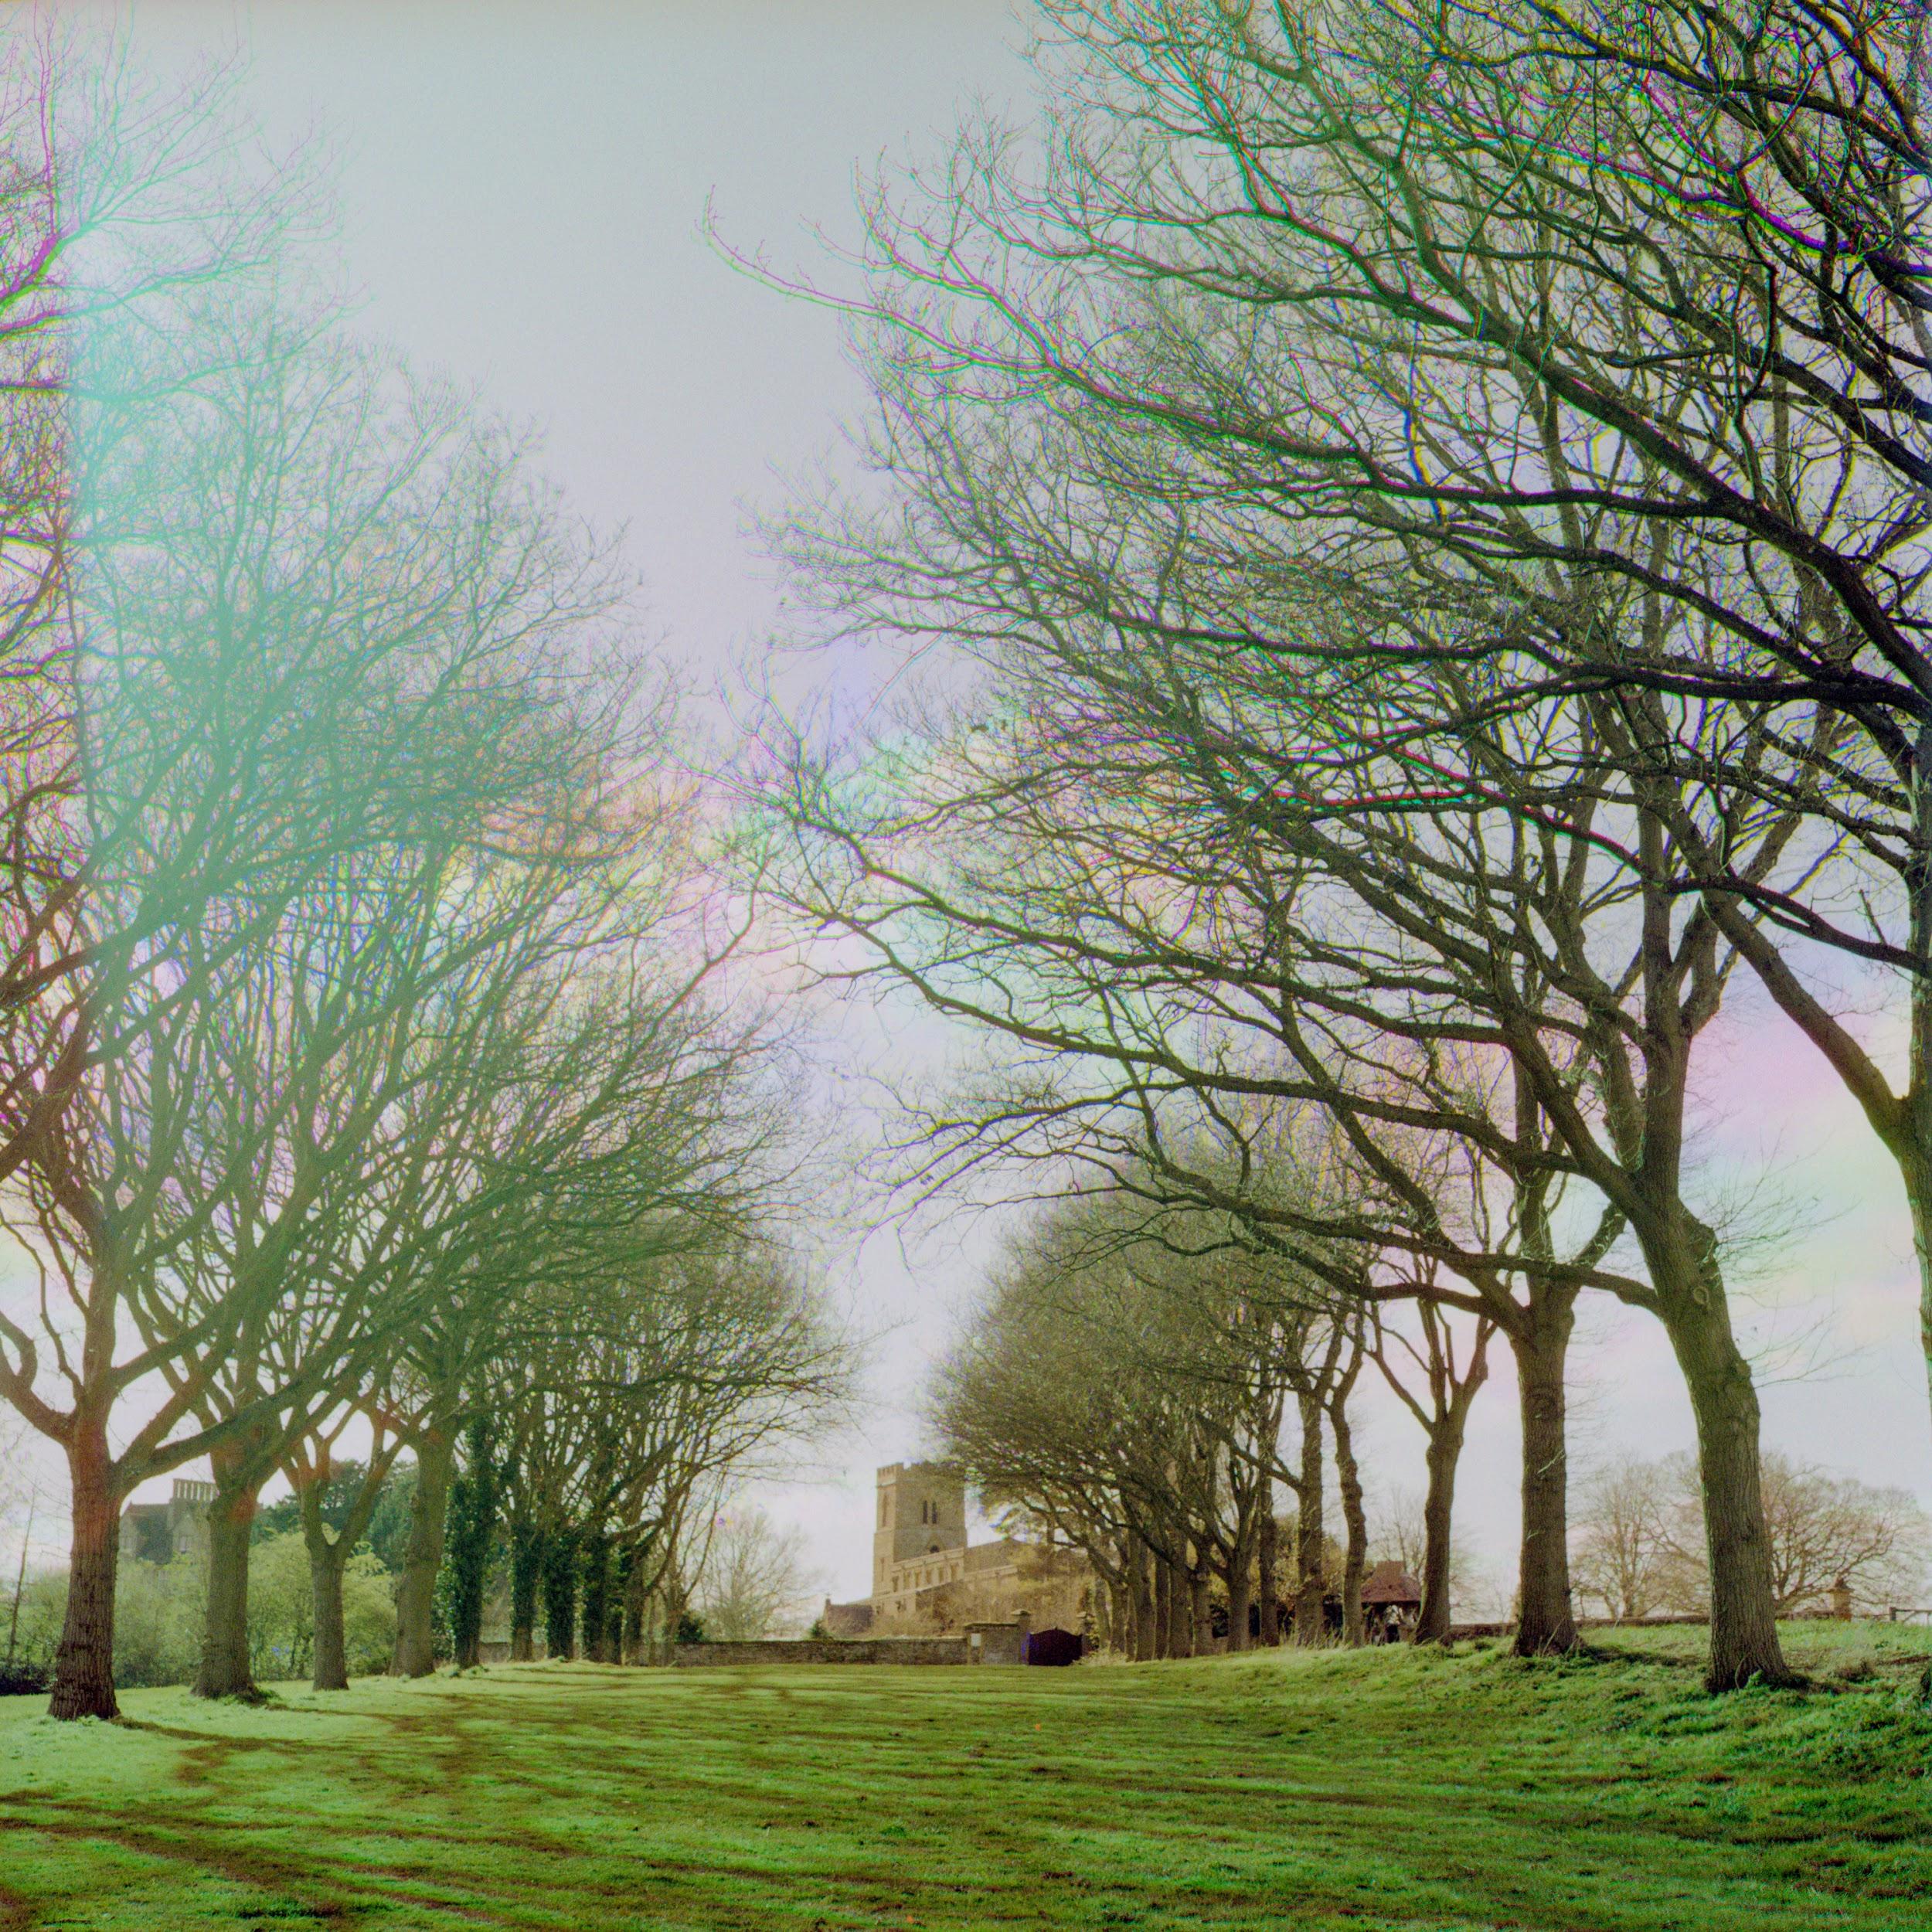
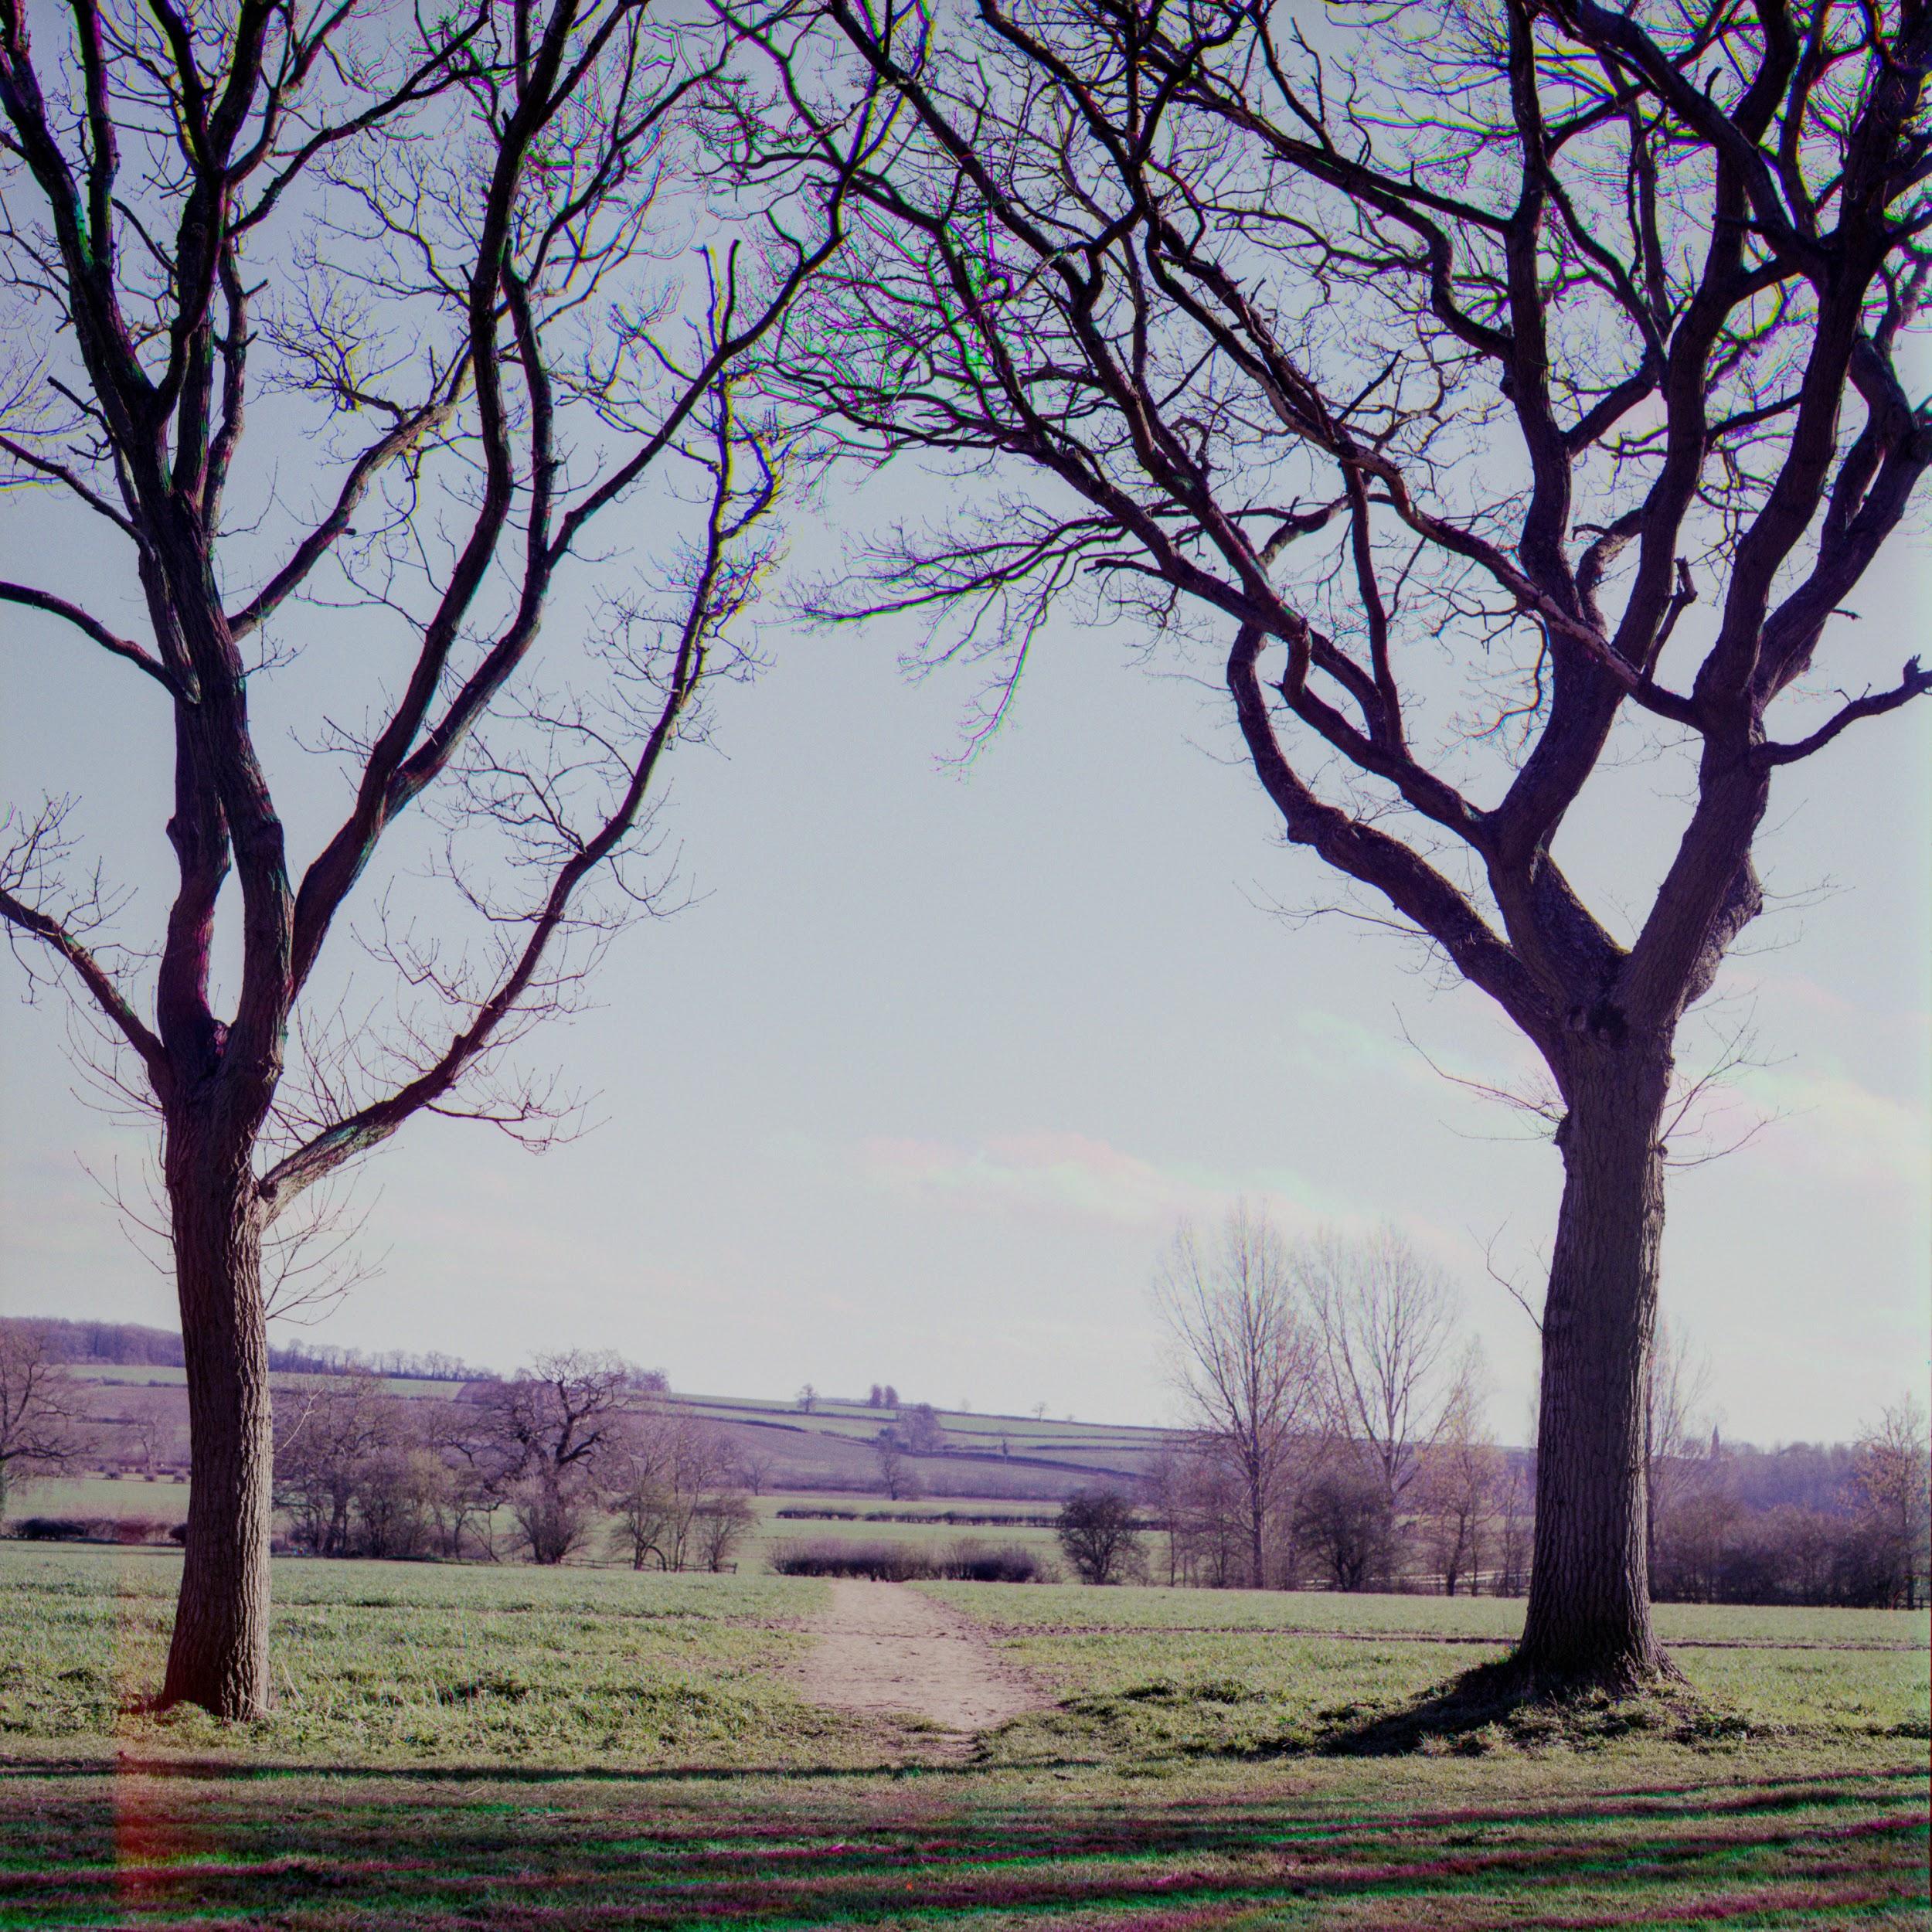
All images above taken with HP5 and 80mm Planar
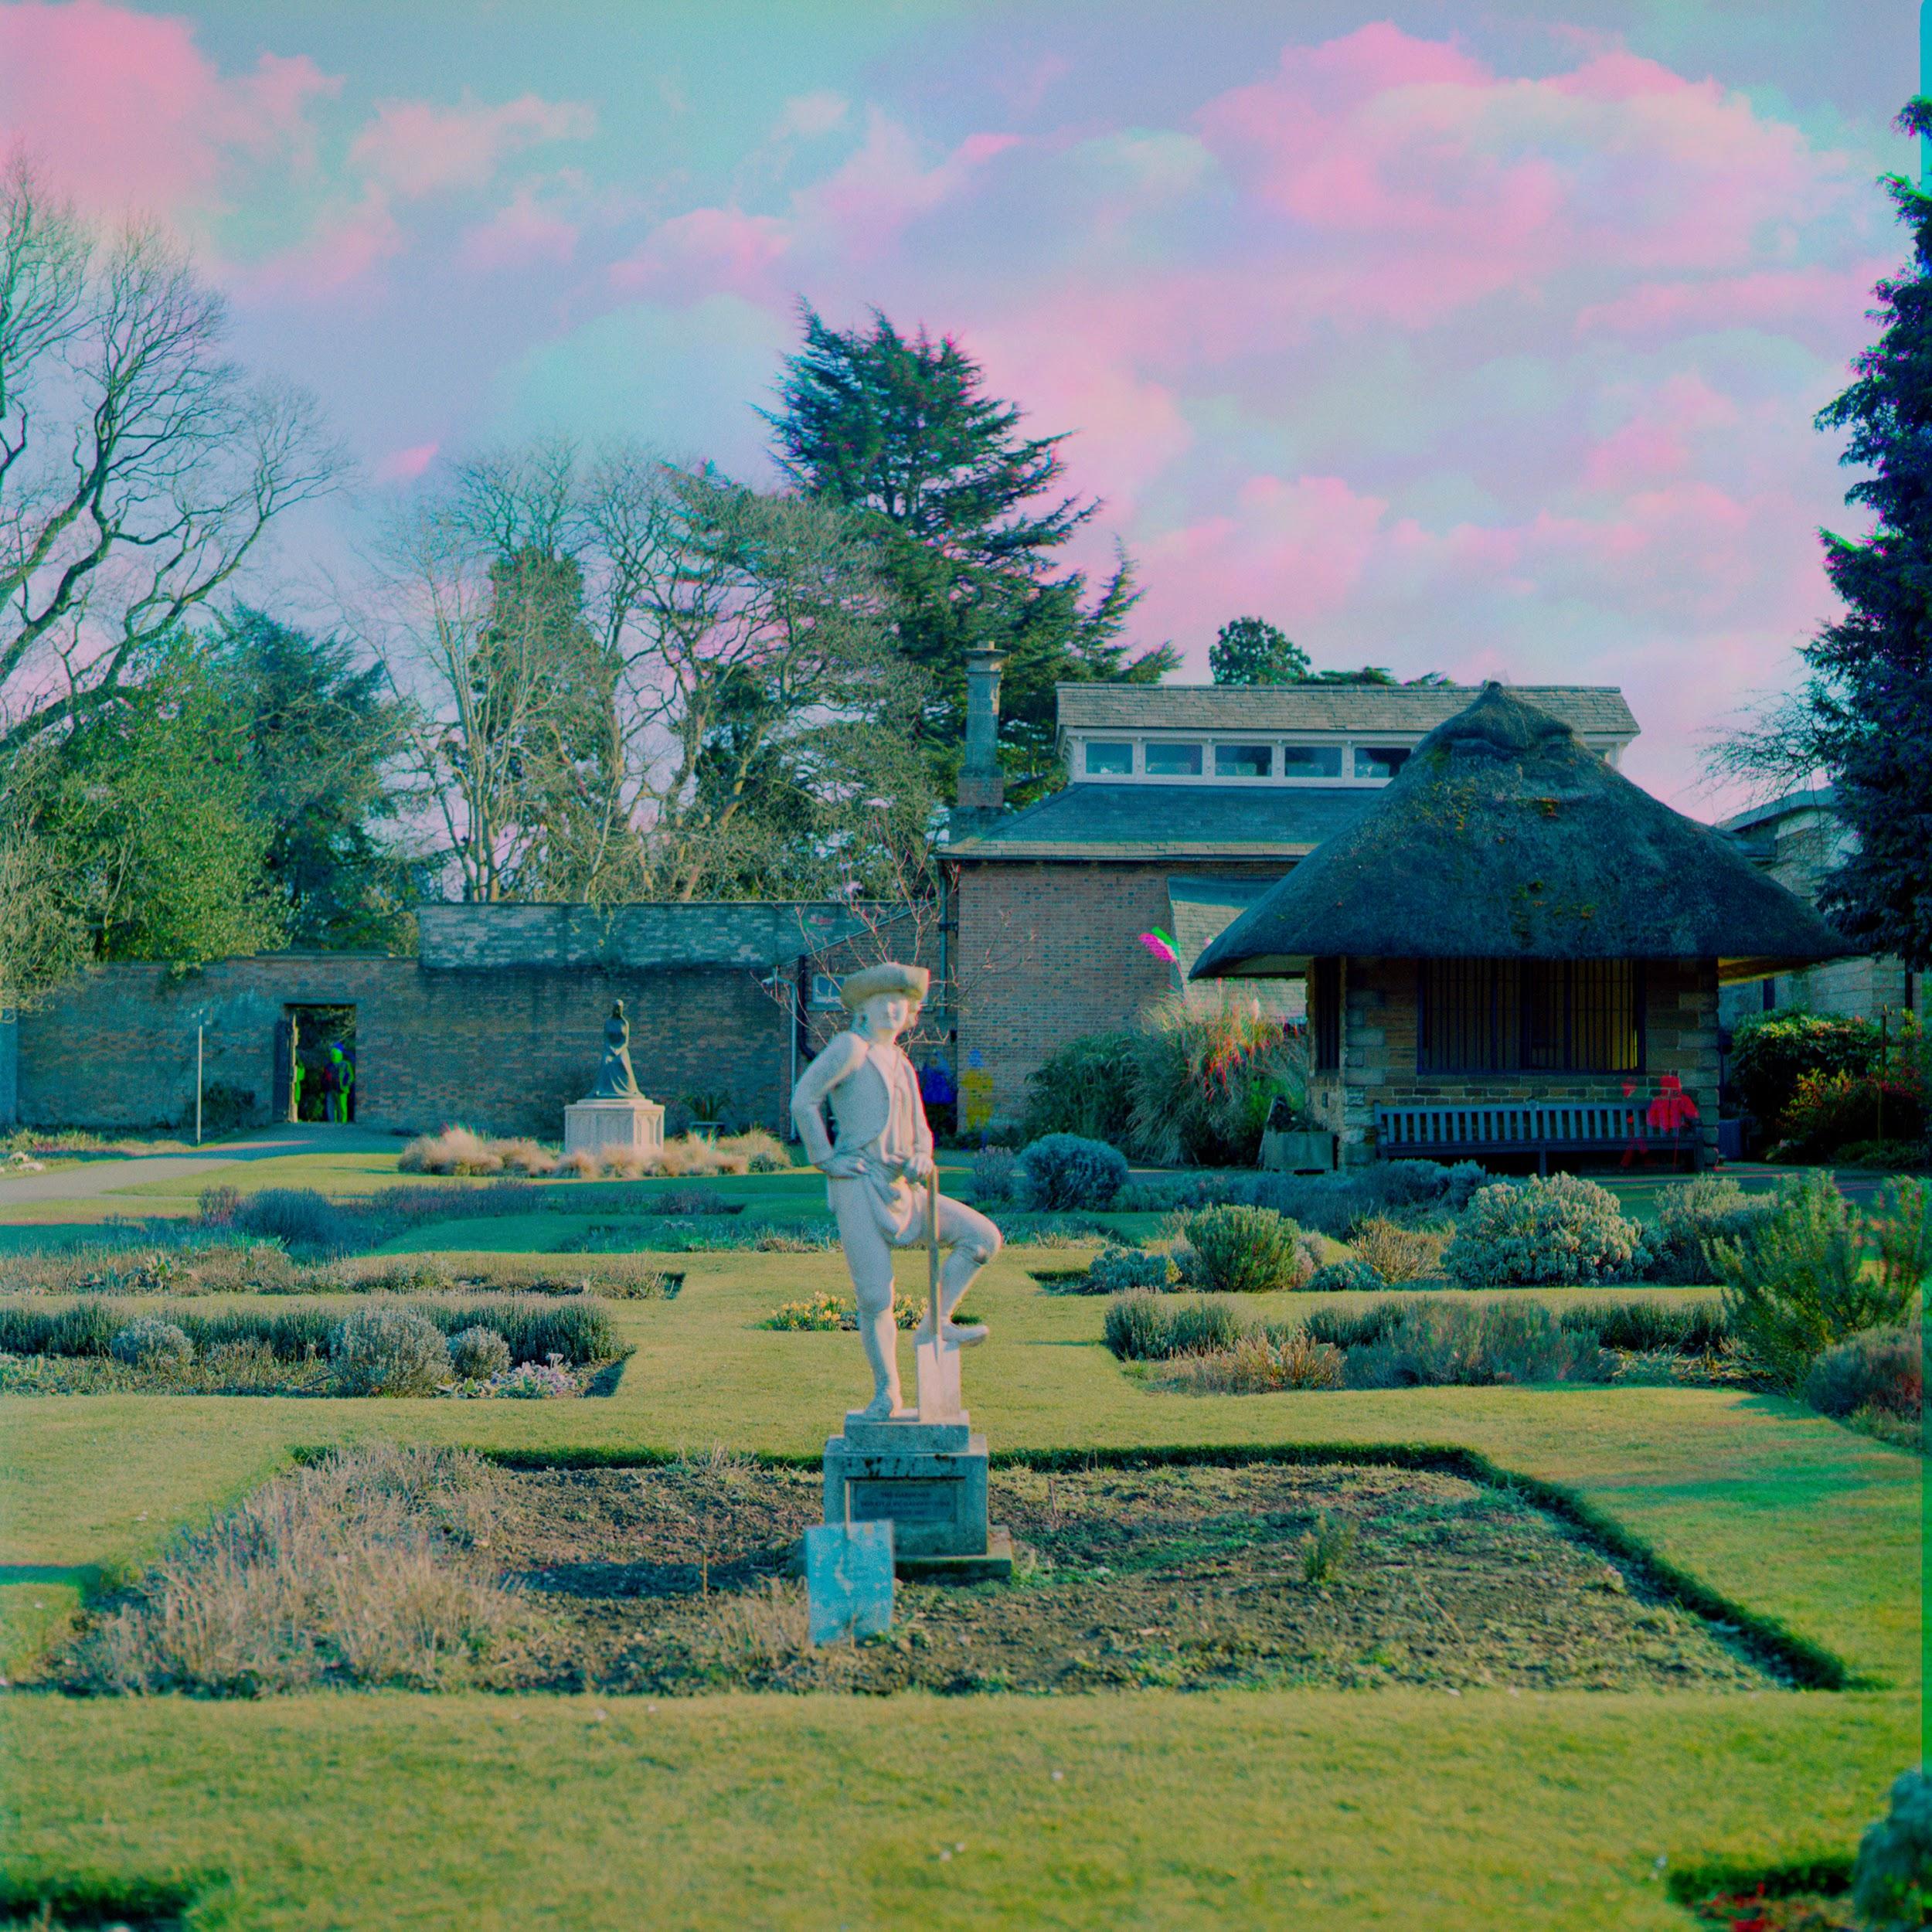
HP5 with 80mm Planar.
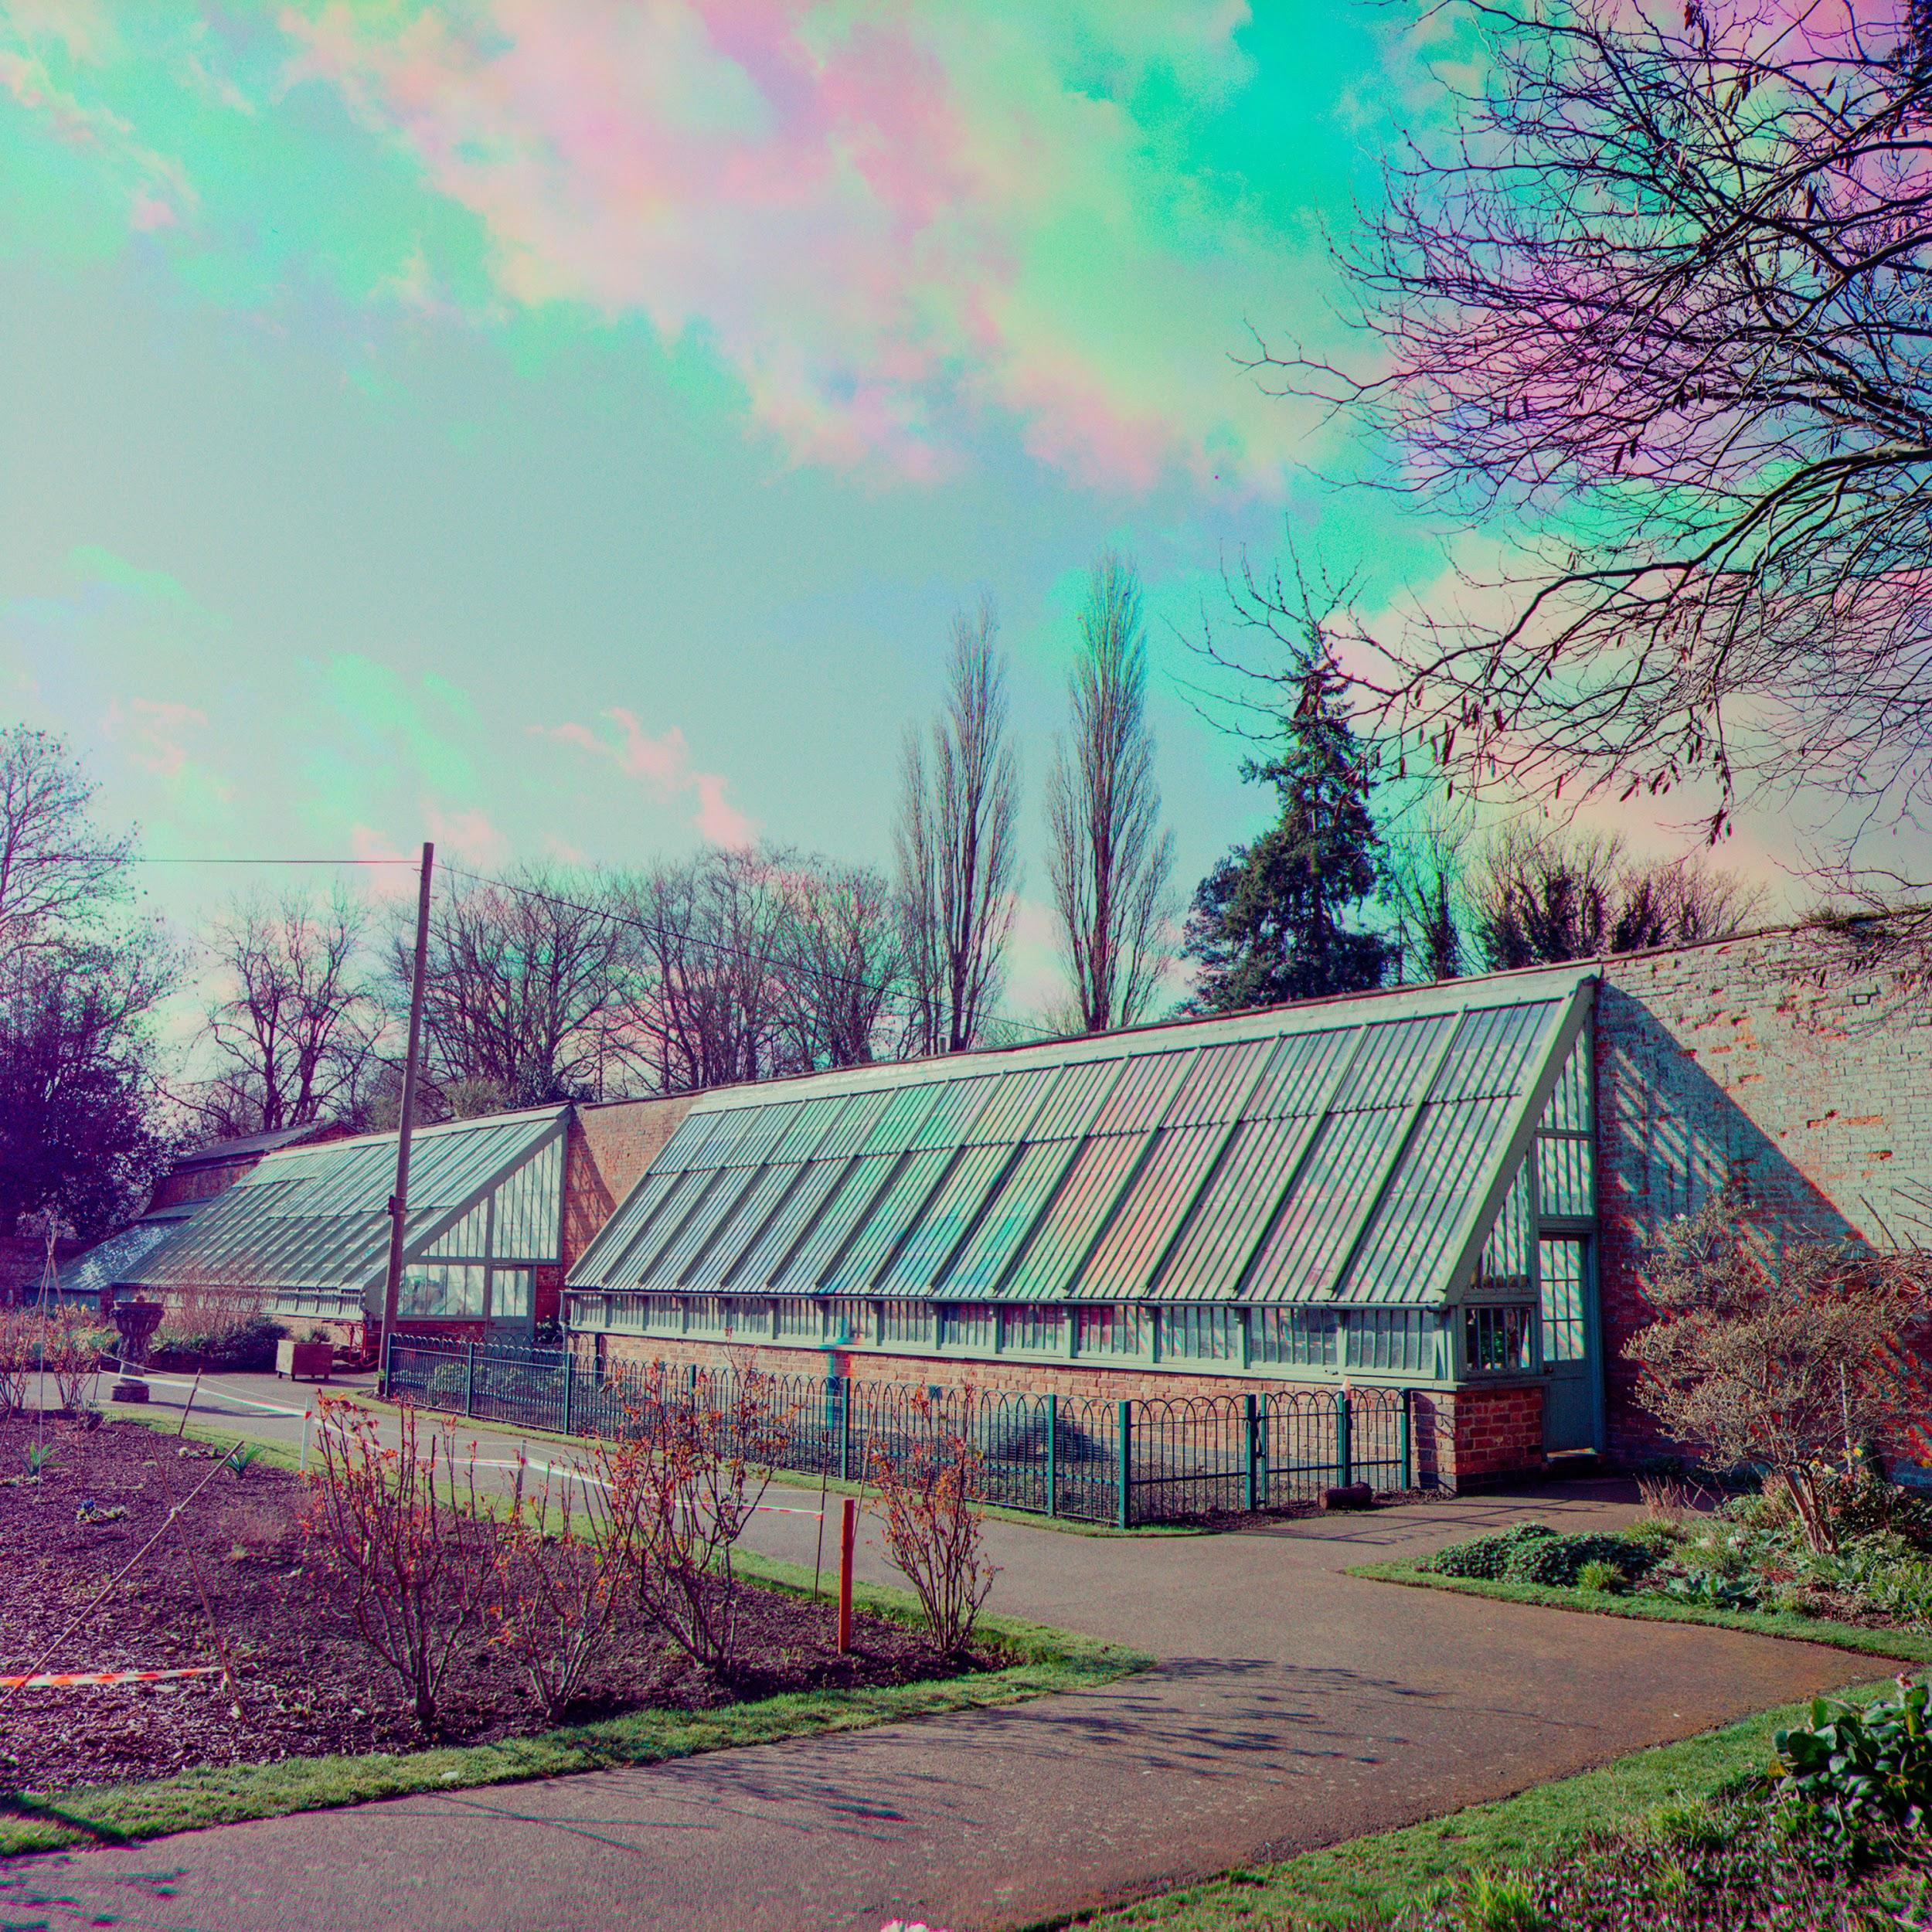

HP5 with 50mm Distagon FLE


I personally wouldn’t shoot colour images like this regularly especially nowadays when we have some fantastic colour film stocks! It has been a great experience to look back and draw inspiration from the methodologies of yesteryear. I am currently working on another effect using similar methods to create a very different effect. Perhaps you can guess what it is if I tell you it uses SFX!

Images © Jack Crofts

19.7.21

5 Frames… At Pennsylvania’s Trolley Graveyard


5 Frames… At Pennsylvania’s Trolley Graveyard on ILFORD Delta 400 Professional (35mm Format / El 400 / Canon Elan IIe + Canon EF 50mm f/1.8 II)

I had the opportunity to participate in an organized trip to a place called the Trolley Graveyard in Windber, Pennsylvania in December of 2020. As this was almost a year into the pandemic, I jumped at the idea of going anywhere at all. It was outside and everyone would be masked and distanced and so it seemed like a safe outing. That 160 mile round trip from my home in Pittsburgh was about an eighth of the total mileage for my car in the year 2020.

The Trolley Graveyard is a private collection of decommissioned streetcars that a man named Ed Metka has been collecting for almost thirty years in Windber, a suburb of Johnstown. It’s not normally open to the public but Mr. Metka will open it to groups occasionally. Ethereal Aperture, based here in Pittsburgh, organized the trip and half a dozen of us drove out there this winter.

There are train cars in better shape inside the barns but it was too dark in there for ISO 400 and I hadn’t brought a tripod or flash so these are all of the trolleys and train cars that have been out in the elements and slowly rusting in the relentless Western Pennsylvania weather.


I took my $25 Canon Elan IIe paired with a new Canon EF 50mm f/1.8 II lens; the 35mm cartridges were hand-loaded from a 100-foot bulk roll. I shot three rolls of ILFORD Delta 400 Professional and one of expired Kodak Gold 400 but these five shots are all from one roll of the ILFORD. It was a very gray and overcast day in Western Pennsylvania, typical here for about half the year, which gives you a signature soft, even light with few shadows. This quality of light turned out to be a good match for the somewhat melancholy subject matter and ILFORD’s Delta 400 does a terrific job of capturing the textures of the metal, wood and fabric surfaces.


Even though the site isn’t open, it’s pretty obvious from these pictures that young folk with spray cans manage to get in there. The graffiti just adds another layer of texture to the surfaces.

I developed the rolls in HC-110 using standard timings from the Massive Development Chart and scanned them in with an Epson Perfection Pro v850 and then tweaked the tones a bit in Lightroom. While I’m quite happy with these, I wish that I had access to a darkroom to print them properly and will eventually do just that, probably on some cooler-tone paper.

Eugene Wilson

22.3.21

5 Frames… Of symbols of the German Democratic Republic 1990-expired ILFORD HP5 (120 Format / EI 80 / Pentacon Six + Carl Zeiss Jena Biometar 80mm f/2.8)


Since 2019 I’ve been photographing the remaining symbols of the German Democratic Republic using a stash of (non-PLUS) ILFORD HP5 medium format film that expired in 1990 — the same year as East Germany itself “expired.” I went full “Ossi” (German slang for Easterner) and chose as my kit the Pentacon Six with an 80mm f/2.8 Carl Zeiss Jena Biometar lens. Both camera and lens remain excellent tools for photography and in their prime, were the creme de la creme of the Warsaw Pact photographic world.

But it’s the film that is the star of my project. My one requirement was that it had expired in 1990. But I also hoped it was black and white film rather than color. With both elements combined, I knew my results would be unpredictable, but from my experience with shooting expired color film, it more often than not looks like garbage. So I was relieved to find a vendor selling 10-pack bricks of ILFORD HP5 that expired 30 years ago. Despite being a Kodak Tri-X ride or die for life type, I snatched up a half dozen bricks and got to work.

For exposure I use a Sekonic L-308 light meter and rate the film at EI 80. While some disagree with the method, I’ve always been someone to reduce the film rating by a stop for each decade of expiration. There’s nothing scientific behind the method, but it’s proven to work well for me so far. Since I’m shooting at such a slow speed and in the cloudy light so common to the area, the Pentacon has lived exclusively on a tripod. All of this has created a slow and deliberate process, something I have come to enjoy as it has made me more contemplative of each exposure in a very finite batch of film.

FRAME 1:

Living in Berlin was an immediate advantage at the start of the project. Despite my east Berlin neighborhood of Prenzlauer Berg long ago losing its GDR-ness to gentrification, it’s a quick tram ride to neighborhoods like Hohenschรถnhausen, which retain much of their eastern character. This photo is of the former GDR sports hotel near the Hohenschรถnhausen sports forum, now the Sportforum Berlin. While I prefer the heightened mood possible during the winter months, I knew I wanted the foliage to give the building a sense that it’s hiding from the camera. It would be easy to mistake this for a normal roll of HP5, as there aren’t blemishes from age as those seen in the other frames. And it’s a testament to the power of 120 film and the Carl Zeiss Jena lens that such outstanding detail is still visible, such as the graffiti seen through one of the broken windows.

FRAME 2:

I’m often faced with the dilemma of just how much modernity I allow in my images. Sometimes they play a huge part in showing the disparity between socialist iconography and the modern capitalistic world (such as when I photographed a bust of Karl Marx next to an abandoned shopping cart.) But more often than not modernity is too jarring a juxtaposition for my taste. In this frame I took three shots, one with a passing tram, another with a DHL truck and this the third exposure. I felt that the graffiti on the bridge over the River Spree was enough of the modern world. This frame is a great example of how this old film can, with its strong blacks and ruptured skies, give an impression of being partially a charcoal drawing.

FRAME 3:

After photographing in Berlin, this year I started traveling to other places in the former GDR. This frame was taken during a trip to Halle Neustadt, which was one of the four “planned cities” in East Germany. Every part of the city was planned and created from scratch after the war and was part of the government’s addressing of the critical housing shortage that plagued the GDR for its entire existence. The result of that shortage was the ubiquitous “Plattenbau” or block building shown in this frame. In addition to the leading and convergent lines, this frame also shows an interesting feature that sometimes pops up with this film: that the exposure counters printed on the back of the film bleed through and are visible on the final exposure.

FRAME 4:

This frame wasn’t actually a planned image as most of the images for this series have been. I was riding home after an afternoon of shooting and the sun was below the horizon as I went through Strausberger Platz on Karl Marx Allee, one of Europe’s last great boulevards. I had one exposure left on a roll and stopped to see what a long exposure would look like on my film. The exposure was a few seconds and I was surprised how much I liked the result especially with the scratches and light trails.

FRAME 5:

On my visit to Halle Neustadt I stayed in a hotel in the more traditional and much older Halle Altstadt. But despite the old town’s more classical atmosphere, there was a fantastic GDR sculpture outside of my hotel in the pedestrian mall. The statue is of a man and woman passionately entwined together. I don’t know why, but the statue really blew me away. Unfortunately, it also proved really difficult to photograph. I chose to make a detailed composition after every framing of the entire statue was ruined by the countless elements found on shopping streets. The final result shows the intricacy of the original work with the creative components of this particular film stock.

JEB INGE

26.12.20

5 Frames… From the Peter Pan Cup Christmas Day 2019, on ILFORD Delta 3200 Professional and HP5 PLUS

Serpentine Lake, Hyde Park, London. Images from the 1914 cup, with 1913 winner G Gyton. 
(Photo: Londonist.com)

The Peter Pan Cup is a yearly 100m race, a swim across the icy-cold Serpentine Lido in Hyde Park. Swimmers have met in the park every Christmas morning since 1864, and the titular “Peter Pan Cup” was first donated in 1904 by author J.M. Barrie himself. 

Participants must acclimatise themselves to the cold across the year, and these weekend swim sessions have caught the attention of a few London-based street photographers who have been documenting those days. I wanted to photograph the event itself, so planned my 2019 Christmas Day around attending this early morning event.

I photographed with two cameras, my Nikon FM2 with 70-210 f/4 Series E lens, and a Nikon FG with a Sigma 24mm f/2.8. I had ILFORD Delta 3200 Professional in my FM2, and HP5 PLUS pushed to 1600 in my FG for use with the wide angle.
I wanted my focus to be on the characters and moments, rather than an all encompassing documentation of the event itself, and I’m mostly happy with the results. I had to make a few compromises due to the crowds which meant getting some images and not others – this is something I will hopefully remedy by attending another year (not likely 2020) and shooting again but from different vantage points, leading to a more complete set of images.

I quite liked the Delta 3200 Professional frames, the grain and the early morning sun were a wonderful combination. The HP5 PLUS was a bit too blocky here, I prefer the airiness and lower contrast feeling from the higher speed emulsion.

It’s interesting looking back at these images – I wrote this article a couple of weeks into the New Year (2020), and now after being asked to revisit this article by EM to add a few more thoughts I am forced to also consider the new context these images now exist in. It may be that we don’t see another Christmas gathering such as this for a while, but I’ll definitely try and be there for when it does happen! However I feel about a possible improvement to the way I made these photographs on an aesthetic and storytelling level they do now represent a strong idea about community coming together in the icy cold, and just having a great time together; very appropriate for a Christmas story. Happy holidays!

Interested to know more: Serpentine Swimming Club

Simon King

22.12.20

I bought a Leica M3: Everything I need and nothing more ...


The Leica M3 is a camera I have lustered over since the beginning of my photography career almost eleven years ago now. Obviously, it looks absolutely beautiful as far as mechanical design and engineering go, and although you hear a lot of people saying the camera you use doesn’t matter, I actually believe it does. I believe if you are using a camera that you are attracted to, you are more likely to go out and shoot with it, thusly making more images. The more images you make, the better you will become.

“So… how and where did you finally manage to get your grubby little mitts on this sexy little number?”, I hear you say. Well, let me tell you.

There is a small privately-owned camera store here in Okayama where I’m living now. The guy who owns it is an old Japanese guy, probably in his 80’s, whose hands shake vigorously all the time…and just happens to be a Leica fanatic. His store is filled with every kind of analogue Leica you can imagine. I would often stop by to say hello and have a look around his store. We would talk for ages and he would show me all kinds of treasures.

There was a Leica M3 in beautiful condition that has been CLA’d sat in the display cabinet with a very reasonable price tag on it. I checked the serial number and found out it was made in April, 1960 — it is twenty years older than me. Every time I would go and see him, I would tell him “that M3 will be mine one day!”. Eventually, I came into some money that I used to pay off my credit card debts and luckily, I had some money leftover. I went straight to see my friend the shaky hand man at the camera store, slammed the money down on the table, and said “give me that M3!”.
I have never held an M3 before. I used to have a Leica M5, so I thought I was ready and to know what to expect but I was wrong. The shop owner opened the display cabinet and with his shaky hands began to pass me the camera. “Don’t drop it with your shaky hands” I was thinking to myself as he was handing it to me.

The moment I held it I knew it was something special. I always hear the Leica fanboys saying how it’s the greatest Leica ever made and I would think… yeah whatever, but really, they are right. This thing feels amazing. The weight of the brass body, the sleek design, the precision of the mechanics, the M3 just screams “SHOOT ME!”

After getting over the initial shock and excitement the next thing I did was to fire the shutter and crank the film advance lever. You know you are in the presence of mechanical perfection when you first wind that lever. Smooth as butter… smoother than butter, and then click! Almost silence as I press the shutter. “Is it broken? Did it fire?” I thought to myself quickly while re-cocking it for another go. I have been so used to my Nikon cameras sounding like earthquakes going off that I thought the Leica was broken. “Quiet isn’t it?” said the owner of the store.

Speechless, I just nodded my head with a silly grin on my face.


One of the main reasons I have always wanted the M3 over say and M4 or M6 is the viewfinder. I am a 50mm focal length guy, always have been and always will be — as the Carl Zeiss 50mm f/2 ZM above should demonstrate. I love that focal length the best. I have used it for so long now that I can see the frame lines without even a camera to my eye, I know what I’m going to get with the 50. No bull sh*t… straight to the point photography.

The first time I put the M3 to my eye I was blown away, firstly by how big the viewfinder is — almost 1:1 magnification — and secondly by how bright it is. It has bright blue tint that helps make it even brighter. In it is the biggest and brightest viewfinder of any Leica M camera and it doesn’t disappoint. The rangefinder patch is big too, very big, making focusing such a joy.

Loading film! Is it troublesome? I wouldn’t say it’s troublesome but it is slow. If you are used to loading SLR cameras with the back door that swings open, then it will take a little getting use to loading an M3. But even though it’s slow it’s not a problem at all. I threw in a roll of ILFORD HP5 PLUS and threw the camera around my neck then went about my day. By the way, I don’t go out shooting because I am shooting all the time. The camera is addictive, it makes you want to shoot everything. I burned through my first roll in a matter of hours. Since buying the M3 just last week it hasn’t left my side. I take it everywhere with me, and I mean everywhere. It has become a part of my body!


Ok… so onto the next thing. The light meter, or lack of one. I don’t even think is a “thing” but many photographers do. I believe a real photographer should know light. Too many people these days rely too much on their light meters. I learned light early on in my photographic journey, and can usually guess within one-stop what my shutter speed and aperture should be in all lighting situations.

At the time of writing this article, I have many rolls of film through the M3 since buying it and every single frame was pretty much a perfect exposure. One thing that really winds me up is when people say they want an M6 because it has a light meter in it. I think that having a built-in light meter should never be a primary factor when buying a camera… but that’s just me!

To sum up, as you can probably guess by now I love this thing. It’s everything I imagined it would be and then some. I think I will own this camera for the rest of my life. I truly believe I will keep it so I can hand it down to my son when he is old enough.

The M3 is everything I need and nothing more.


Kurt Gledhill